Monday, August 31, 2015

How to read crochet charts: Bobble Stitch


Here's another chart I found for the "how to read crochet charts" series. It is for a bobble stitch pattern which is really interesting and although a bit tedious if you work on a big(ger) project, it gives the project an amazing texture. 

To make a block follow the instructions which say to chain a multiple of 2 (+1).

The chart shows a foundation chain made of 13 st +1 (14).
Row 1: starting from 2nd st from hook sc across. Ch 1 and turn work.
Row 2: Make a 5dc bobble stitch in the 1st st, sc in the next. Repeat this pattern to the end of the row. The row ends with a bobble (and a sl st). I omitted that sl st in my project. I don't think it is necessary. Ch 1 and turn work.
Row 3: Insert new color. Sc in all stitches across. Ch 1 and turn work.
Row 4: sc in the 1st st. bobble in the next. Repeat pattern to the end. The row ends with a sc.
Row 5: repeat row 1 and so on.

Remember to cut yarn and change color after rows 2 and 4.
Bobble away ...


Friday, August 28, 2015

Little Miss Jewelry - sneak peek


I have been stocking up my other shop with some new girls' necklaces. I must tell you that making these was a pure joy.  I enjoyed playing with beads and making all sorts of combinations. And finally managed to reduce the amount of both beads and flowers and make space for new ones.

Do you like them?


Some pieces of the past collection


Wednesday, August 26, 2015

10 Fantastic Plate Wall Decorations


I have mentioned once or twice on the blog that we are renovating our place - we are nearing the end - thanks God - and I want to decorate one section of the living room with plates. I've seen that idea on someone's blog and completely fell in love with it.

I searched the internet for some inspiration and these are my top favourite.


 Via


  Via Via


Tuesday, August 25, 2015

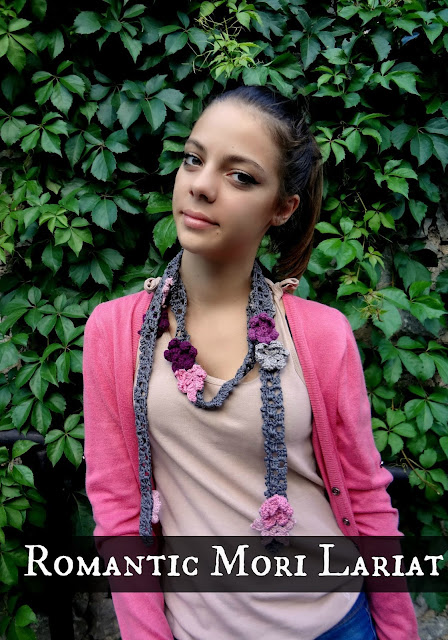
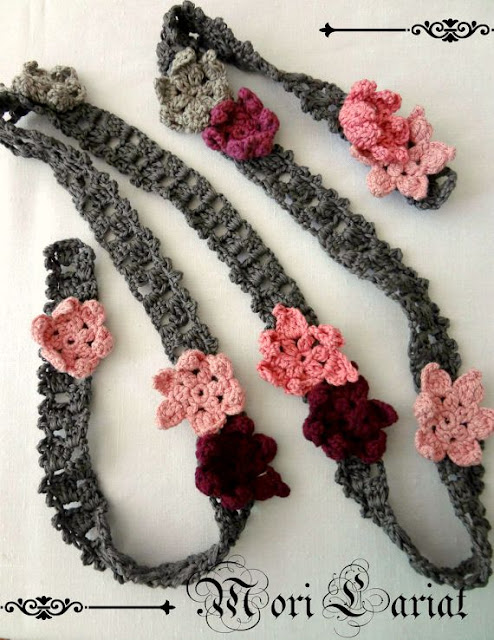
Romantic Mori Lariat Pattern

 
crochet pattern
 
 
crochet lariat
 
I am sure you remember the lariats from my Mori Collection.
 
Well I had people asking me for the pattern for this one and I wrote it down.
 
It works up fantastically easy and can be styled differently just by alternating the wrapping around the neck.
 
It can also be used as a belt for breezy summer dresses.
 
Find it on etsy and a ravelry.
 
 
crocheted lariat

crochet pattern


Monday, August 24, 2015

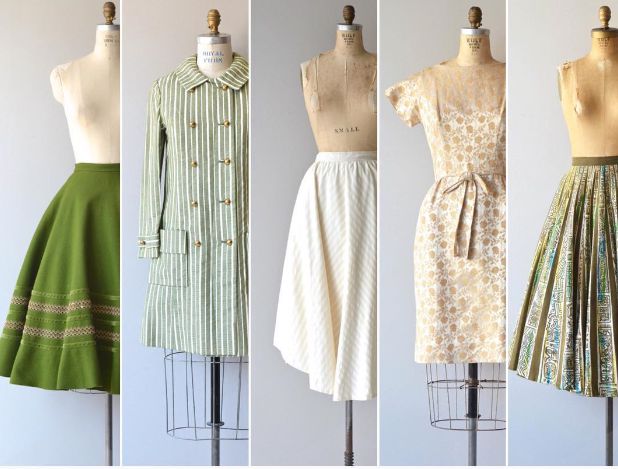
Insta feel - Dear Golden Vintage Shop


One of the instagrammers whose pictures have completely taken me over the minute I happened upon is Lauren's Dear Golden.  
 I am stunned by the amazing and captivating designs and the impeccable craftsmanship of these timeless pieces.


What is Dear Golden about?
As Lauren has written in her blog's about section: "DEAR GOLDEN is a curated vintage shop that brings hand-selected vintage garments from the 1920s through the 1980s to modern women who aspire to stand out from the crowd in the very best way. Each garment is selected for its fashion relevancy and overall quality".


Follow Lauren on IG, her shop and blog.

Saturday, August 22, 2015

Easy Fabric Necklaces

how to make fabric necklaces
 
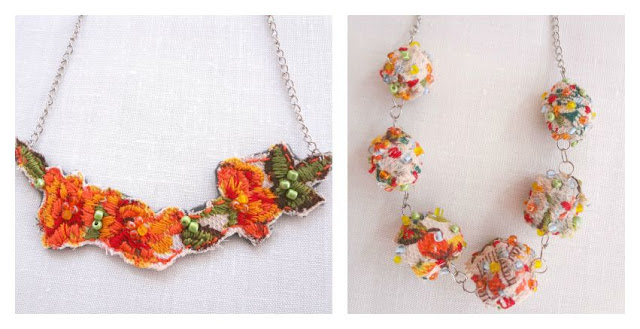
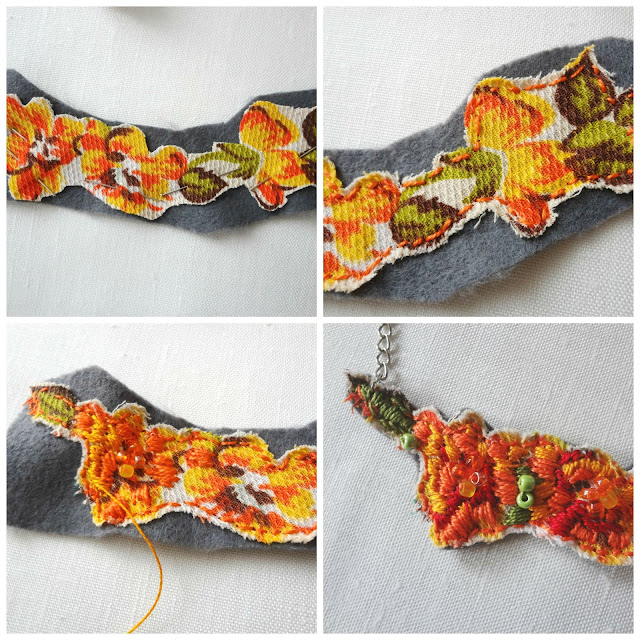
These are my new fabric necklaces. To make them I used a vintage piece of fabric I got from my grandmother in law. It wasn't a piece actually - it was a sack. It showed some wear and tear in certain places, but most of it was fine. The moment I saw it I fell in love with it. I forgot to take a picture to show you the fabric, but I am having a post on my vintage fabrics coming, so you'll get to see it soon. Although the print may look deceiving - both necklaces are from the same fabric. Isn't it amazing?
 
For the bead necklace, I made the fabric beads using the tutorial I wrote about here, beaded them and did some light stitching. Then joined them with jump rings and I made (currently) my favourite necklace.


Make a fabric necklace
 
 
How to make fabric beads
 
 
For the other necklace, I cut out a part of the flowery print, pinned it onto a felt piece, stitched it all around to fix it, added some seed beads and stitching. When it was done, I cut out the excess felt, added jump rings at the side and hung it onto a metal chain.
 
 
Make a fabric necklace


Fabric necklace


Thursday, August 20, 2015

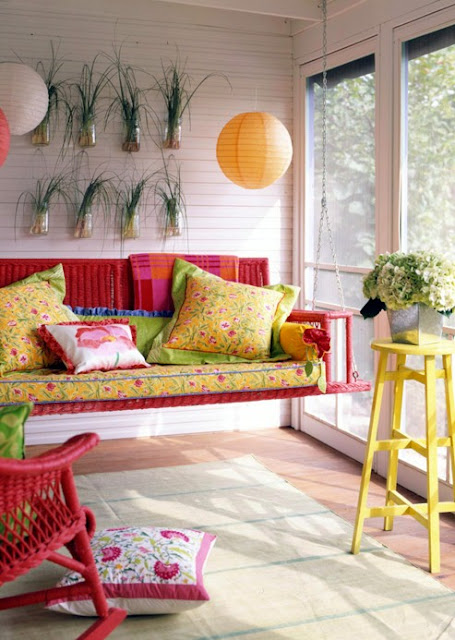
10 DIY Home, Porch and Backyard Swing(Beds)


However shocking this may sound to you, we don't have a swing. Yes, that's true and a little bit sad, because I have always wanted one. And I envy people who have a swing bed at home! Can you imagine having a swing bed at home?

I never cease toying with the idea of making one so here's a selection I made of some absolutely dreamy swings. Some are made of recycled and repurposed pallets, beds, doors and even cribs. There are tutorials and ideas, so feel free to plunge in! 

Inside:


Via

swings
Via


Outside:
 
 
 Via


Tuesday, August 18, 2015

DIY Tassel Bracelets


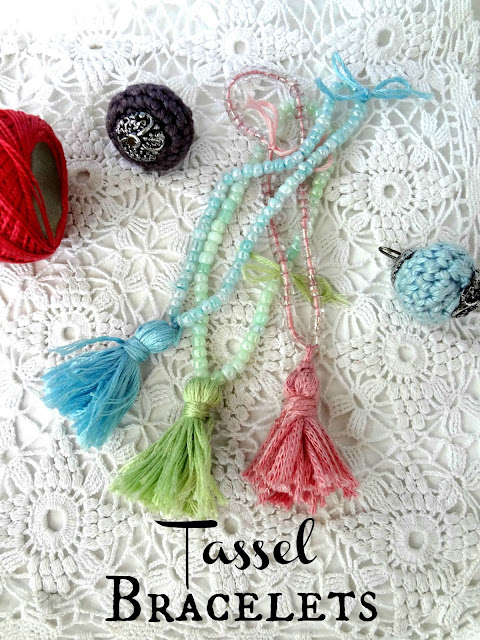
bead and tassel bracelets
 
 
Have you noticed how popular tassels are lately? You can find them everywhere - sewn on pillows or blankets, made into a garland, put on jewelry.
Personally, I find them very cute. Especially when incorporated in a jewelry piece. And I thought I might make some for me and Eva. So here is an easy tutorial how to make tassels and tassel bracelets.
 
 
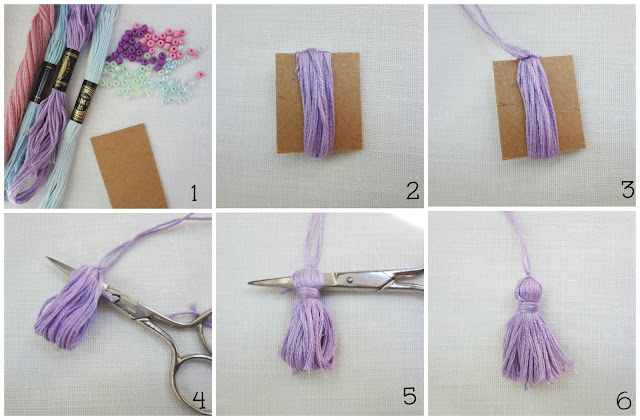
1. To make this project you will need:
 
* embroidery floss
* a small piece of cardboard
* tapestry needle
* sead beads
 
 
2. The cardboard piece is 3 cm / 1.2" long (so is the tassel). Wrap the embroidery floss on the cardboard - the more you add -the bigger / fatter it will get.
 
3. Cut a longish (about 15 cm / 5.9") piece of floss, insert it inside the tassel in the make and tie it at the top two or three times to be sure it will stay as is.
 
4 / 5 Take the tassel off the cardboard carefully. Insert a pencil (I used my scissors) at the top and using another piece of floss, wrap it near the top several times and then tie it to secure that part.
 
6. Pull the scissors out and cut at the bottom. Trim the tassel. Do not cut the top floss because you'll use that to tie the tassel on the bracelet.


DIY tassels


1. Next, string beads and make the bracelets.
 
2. Tie the tassel on the bracelet.
 
3. Thread a tapestry needle with the floss of the tassel and put it through the center of the tassel t actually hide it. If it peaks underneath - trim it. Do so with the other end. 
 
 
DIY tassel bracelets


DIY tasselstassel bracelets
 
And that's it!
 
You can use the tassels to make this lovely wall ornament too.


tassel bead bracelets