
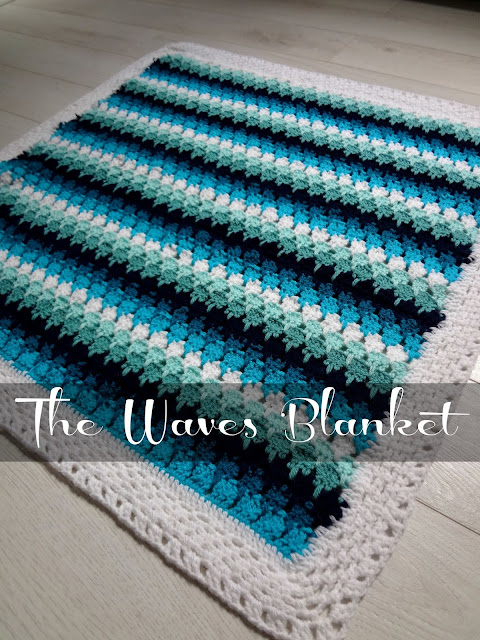
Ever since I posted an image I found on the internet showing the larksfoot crochet pattern (or also known as the icicle stitch) the traffic I receive due to that image is mind-boggling and I've received so many mails from people asking for the pattern so I decided it is fair I post the pattern for it.

Since this post was prepared long before I started my travels, I forgot to note down the size of the sample block so I will update this once I return home.
For the sample block I used sport acrylic yarn and 3mm hook. The pattern uses multiples of 4.
Let's begin:
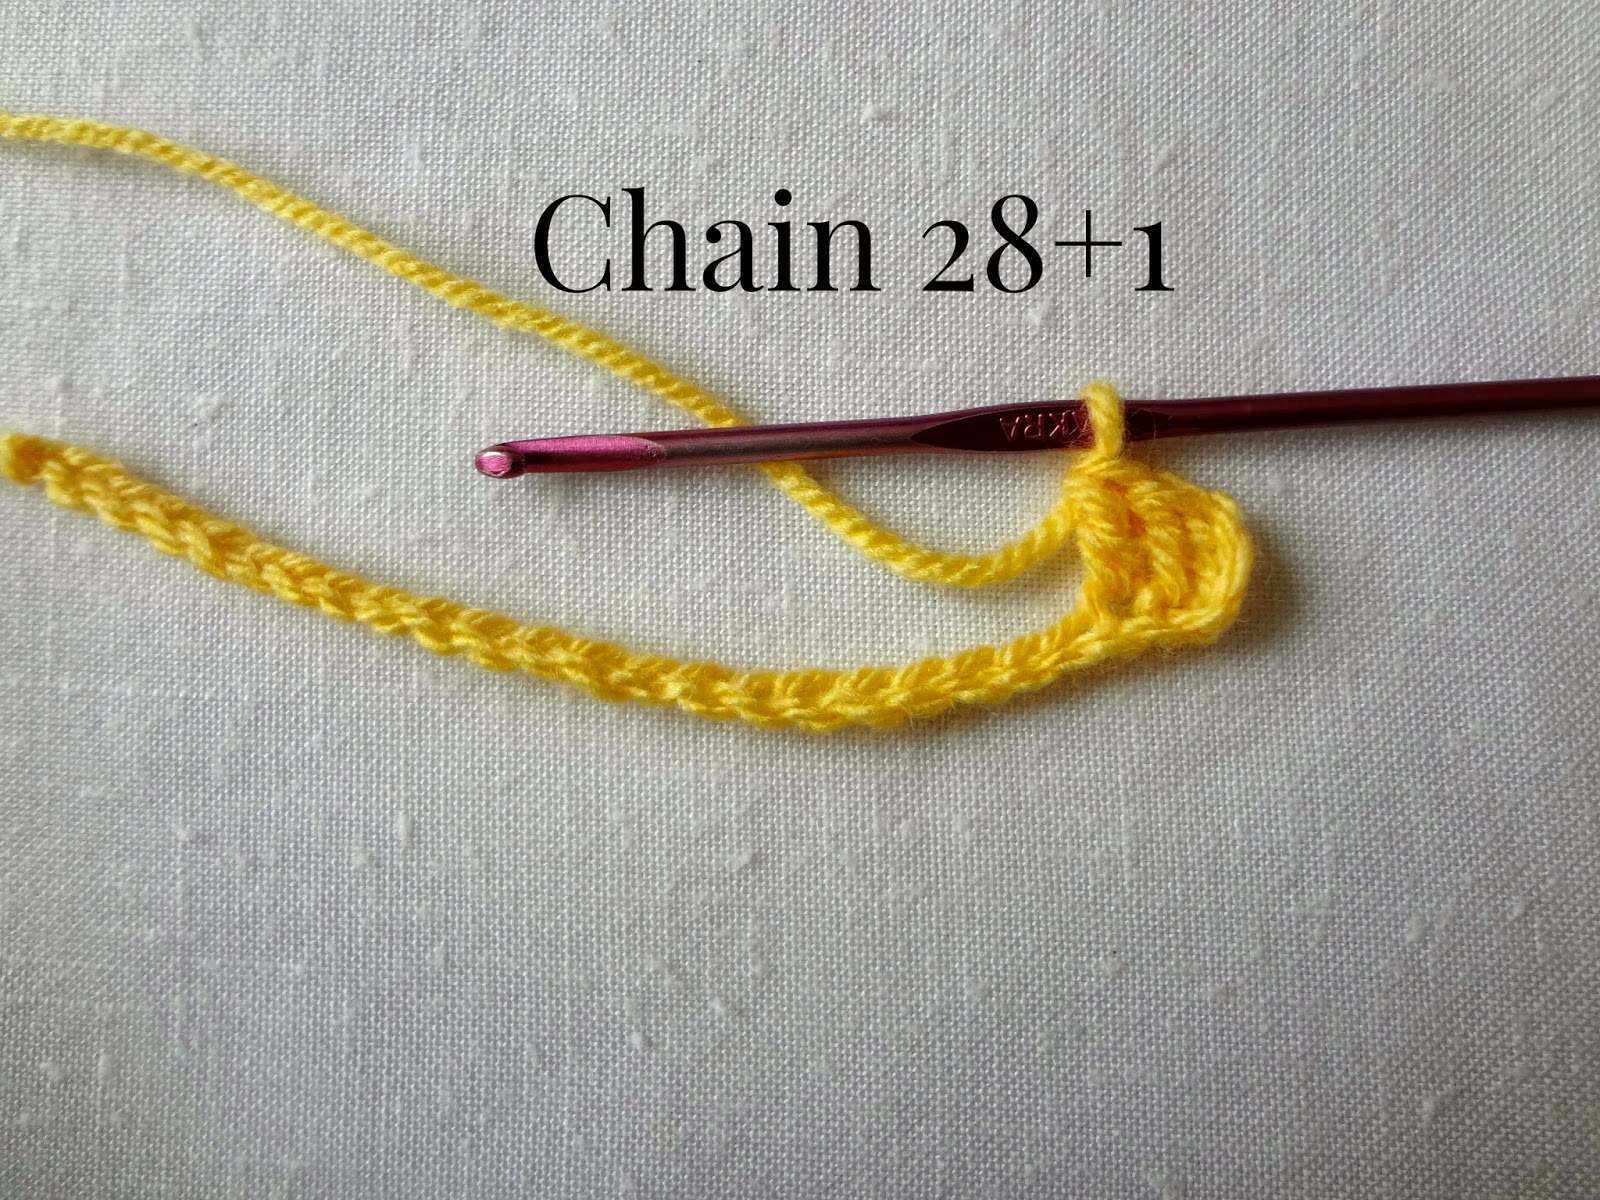
Foundation: for the sample block I chained (7 x 4) 28 + 1
Row 1: dc 1 in 4th st from hook (makes the 2nd dc), then 1dc, ch 1, sk 1, 3dc.

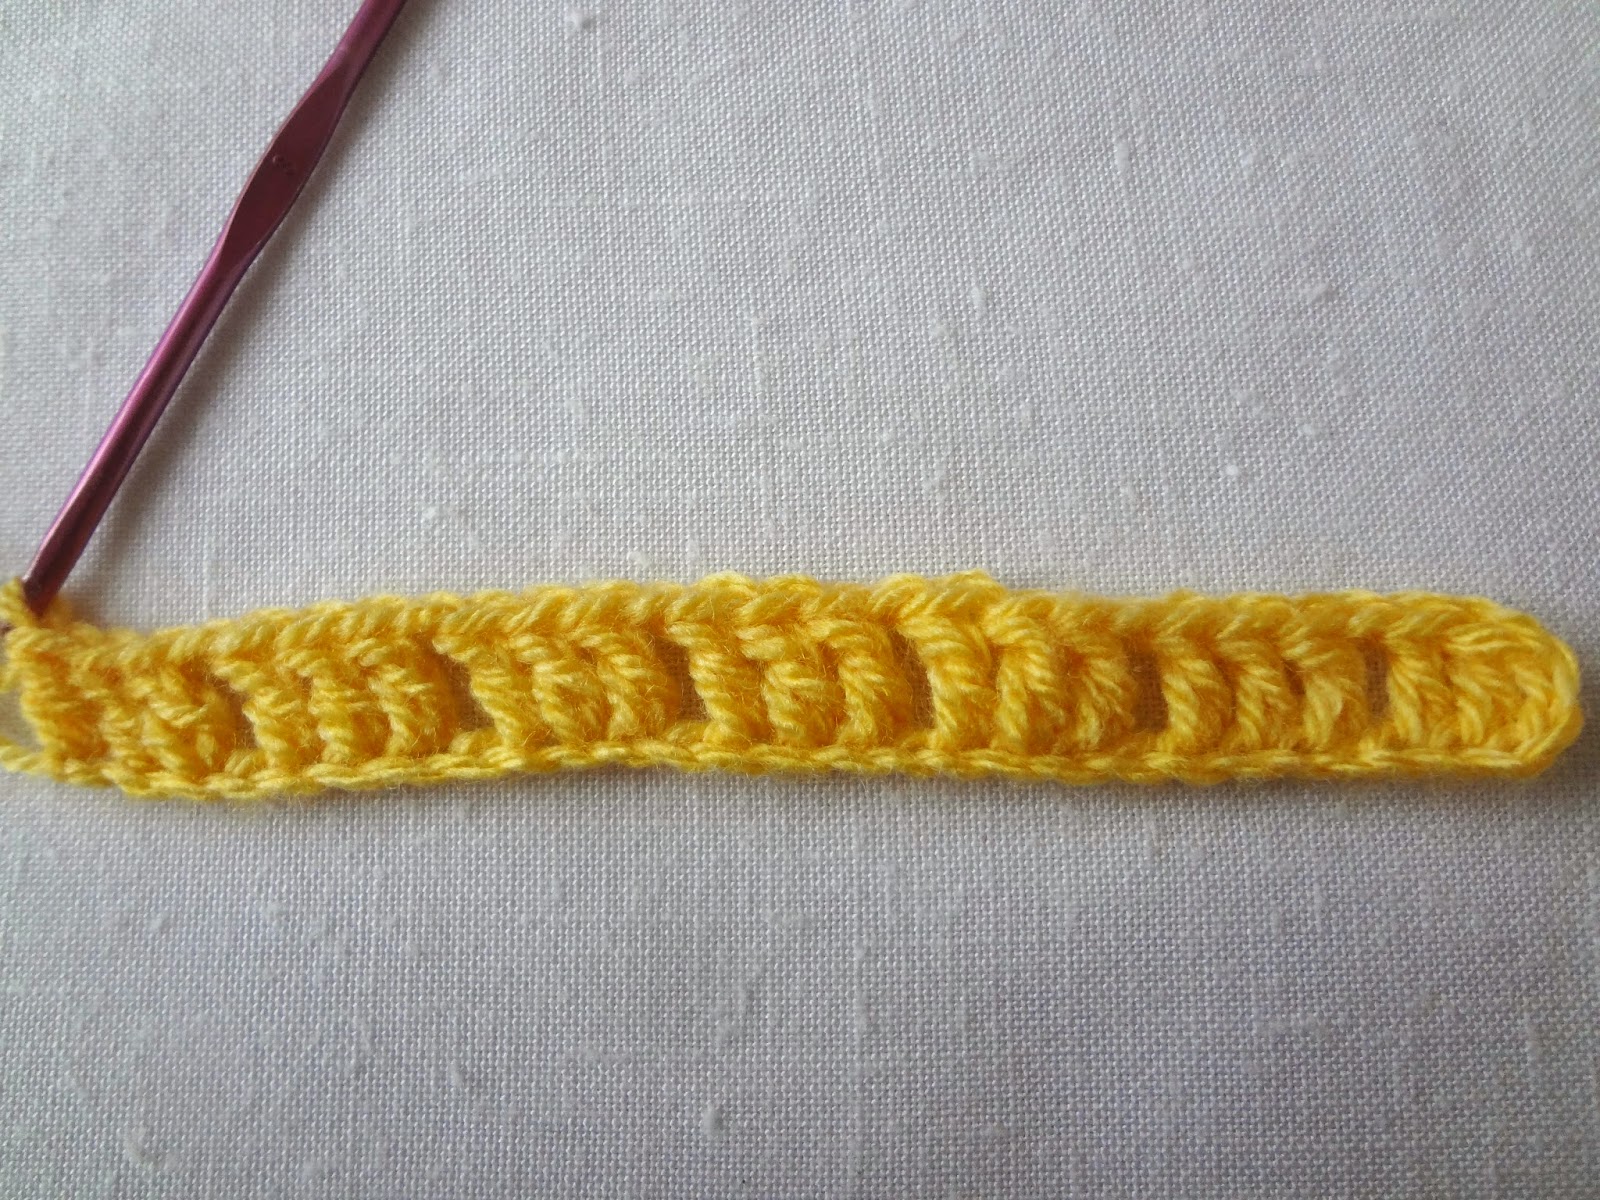
Here's the first row finished. As you can there are 7 sets of 3dcs + 1 skipped stitch = (4 sts), which is 7x4 = 28 sts.
Row 2: repeat row 1
To start it, chain 3 (counts as the 1st dc) and 2dc in the next two sts.


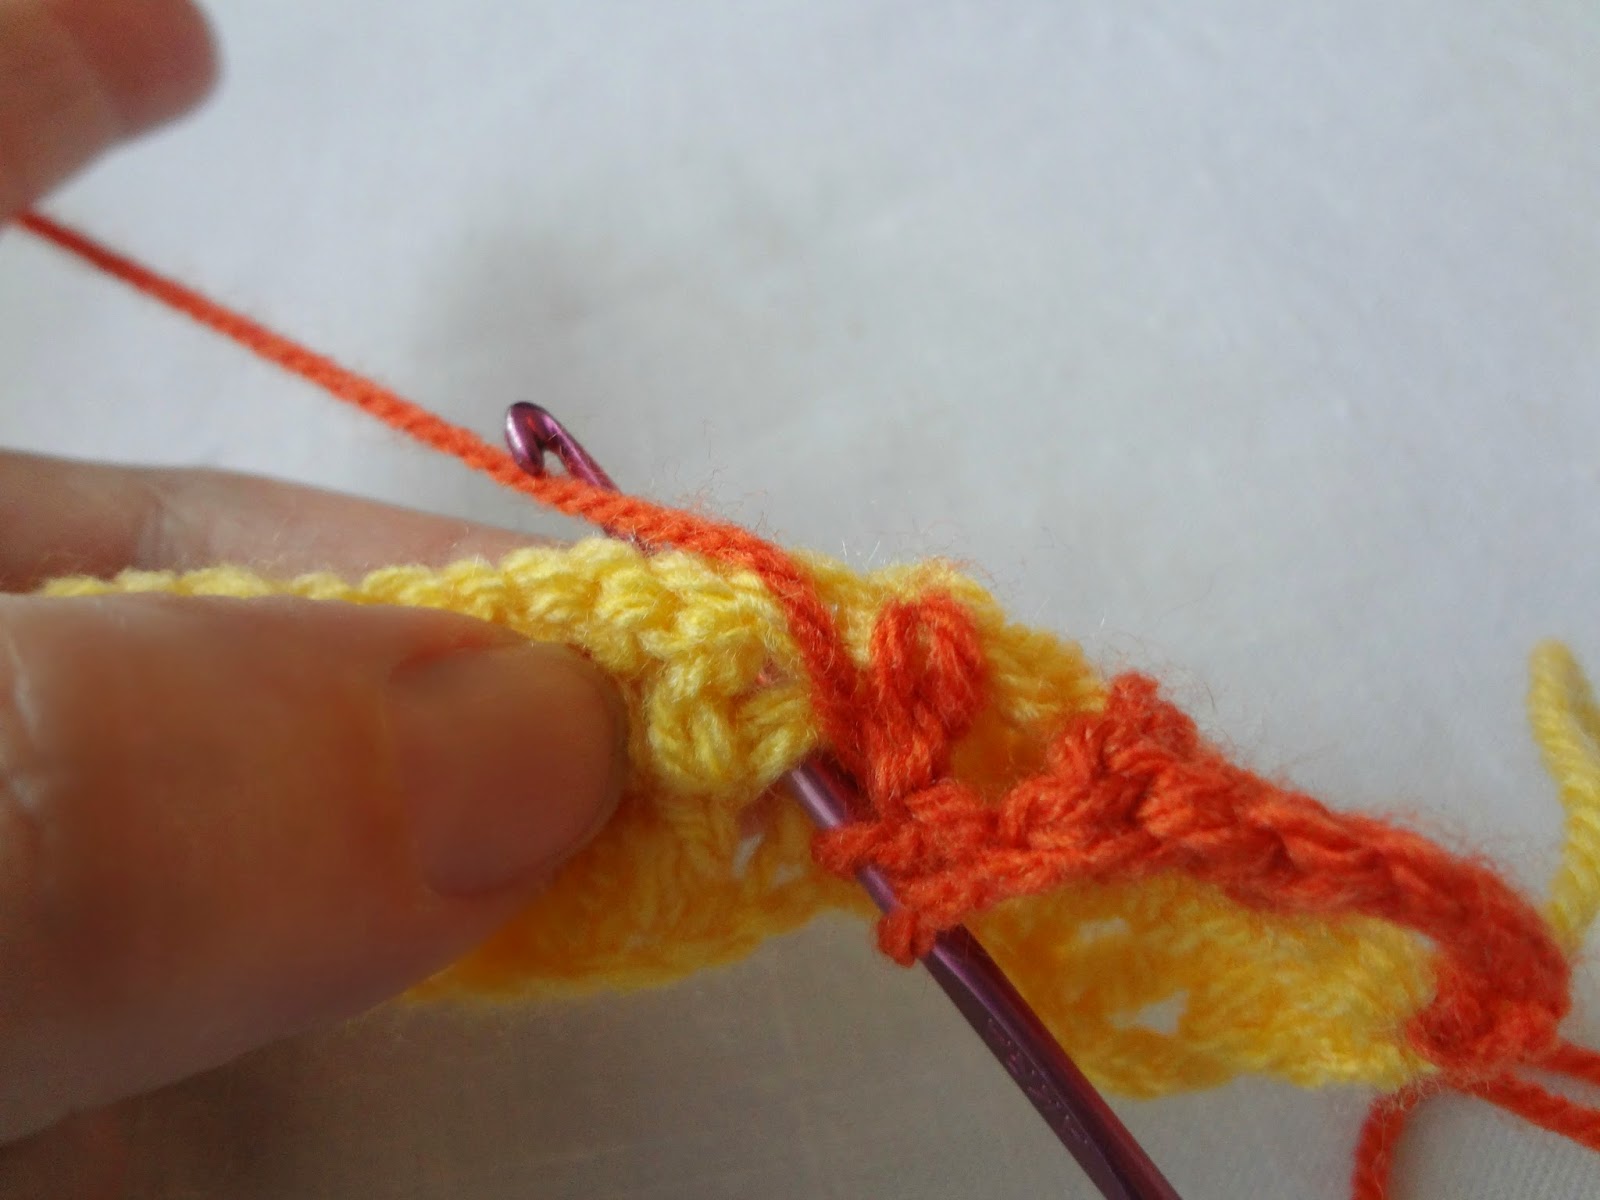
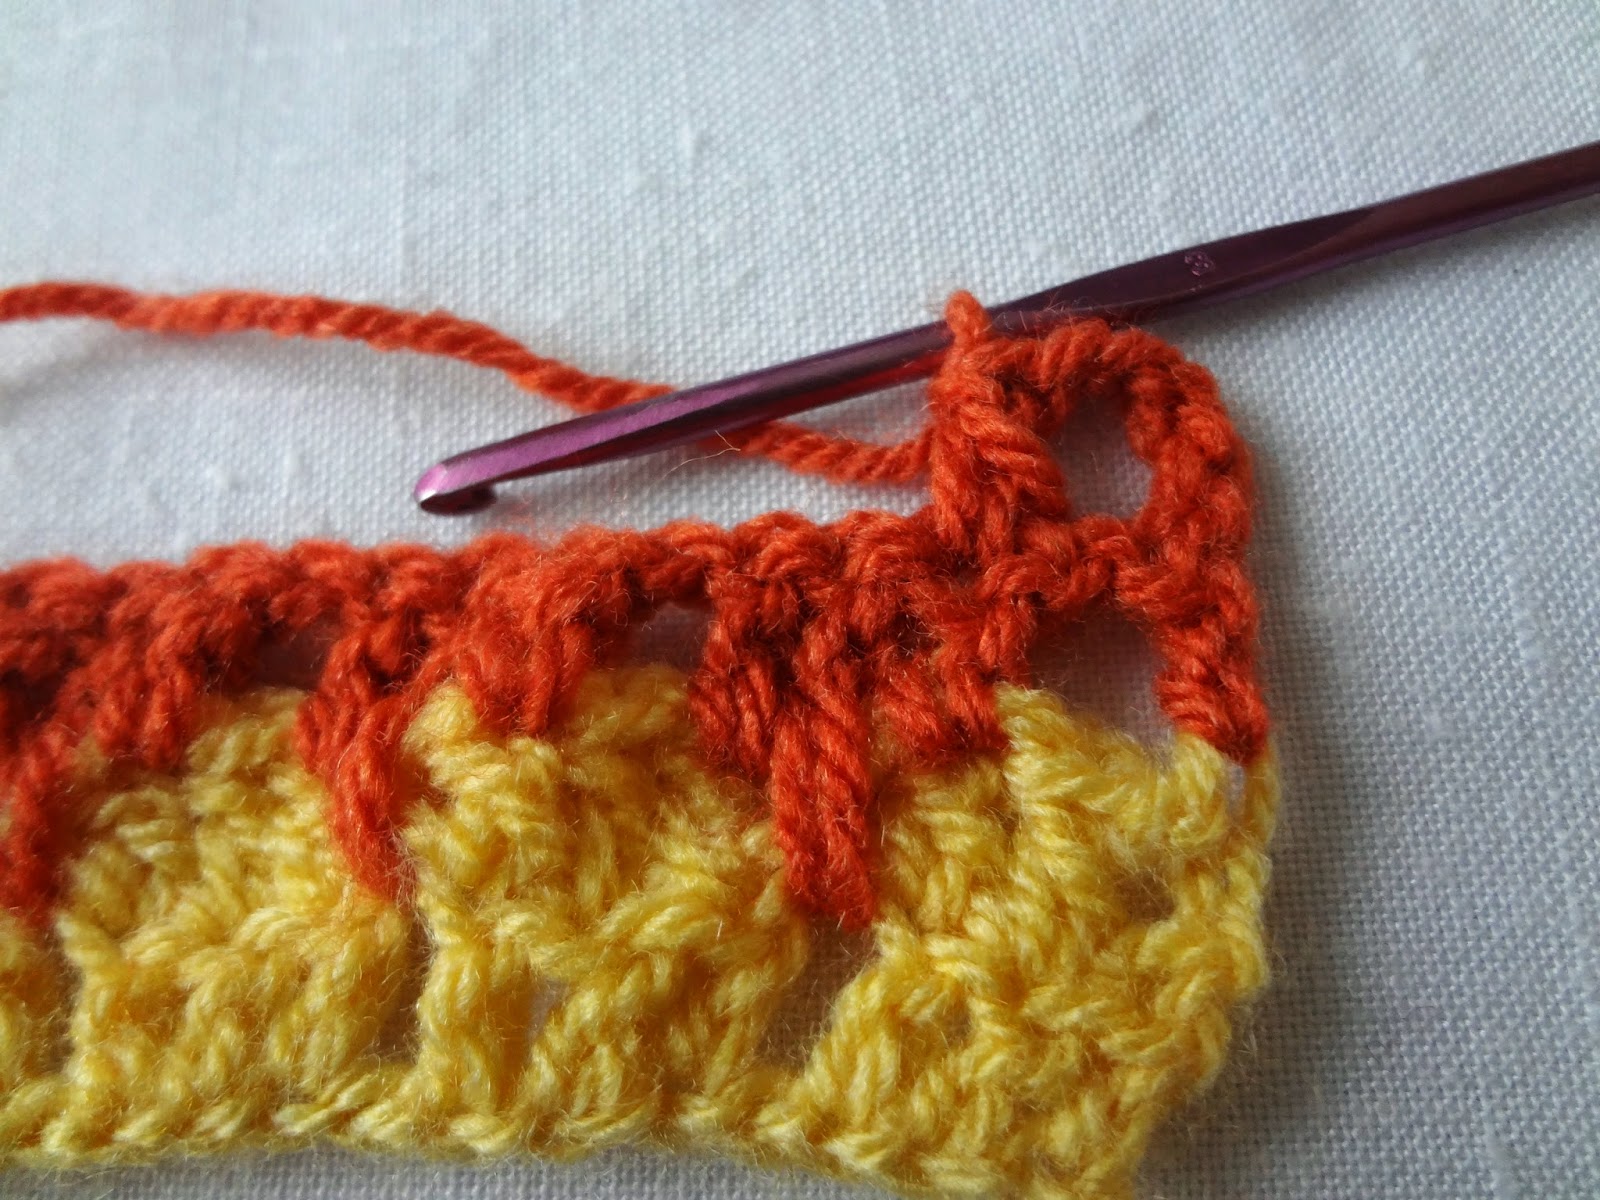
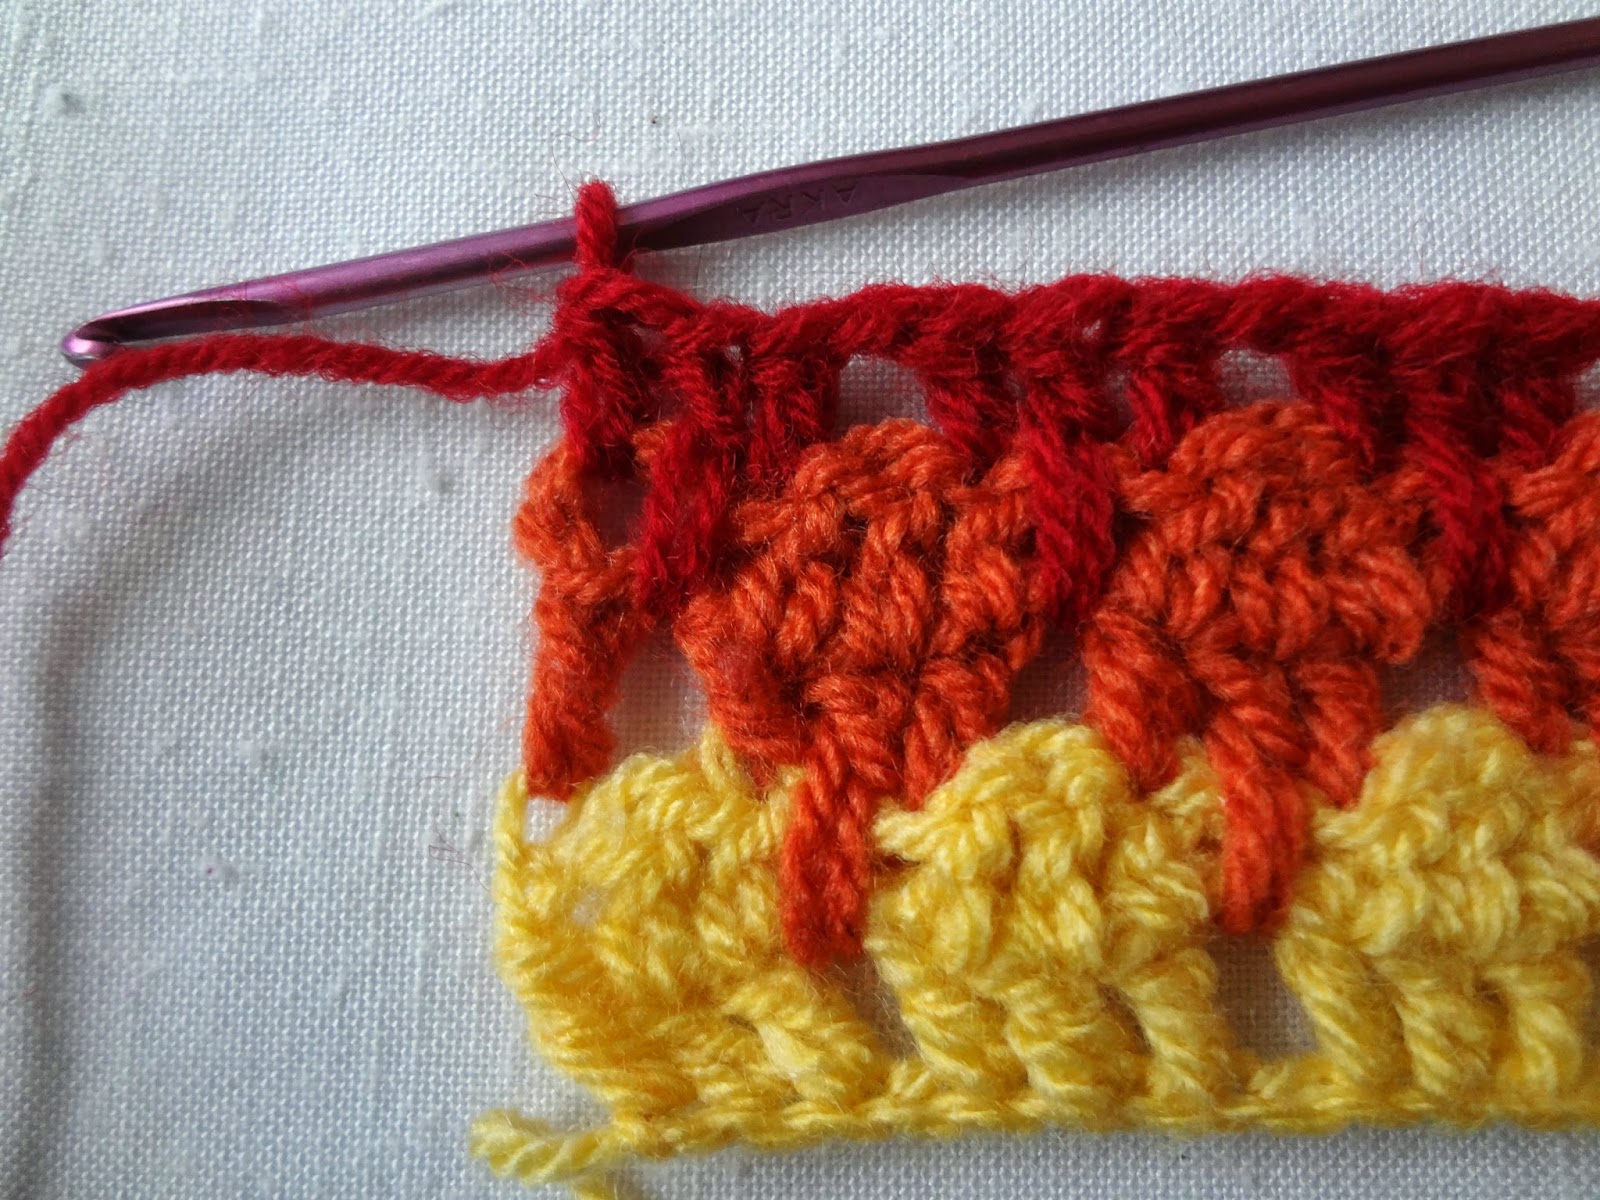
Row 3: Ch 4 (counts as 1 dc and 1 ch), sk 1, 1dc (over the 3rd dc in the row below), 1 elongated dc (encompassing the space of this and the row below it), 1 dc in the next stitch. This is the pattern for this row.
To divide it in steps it looks like this:

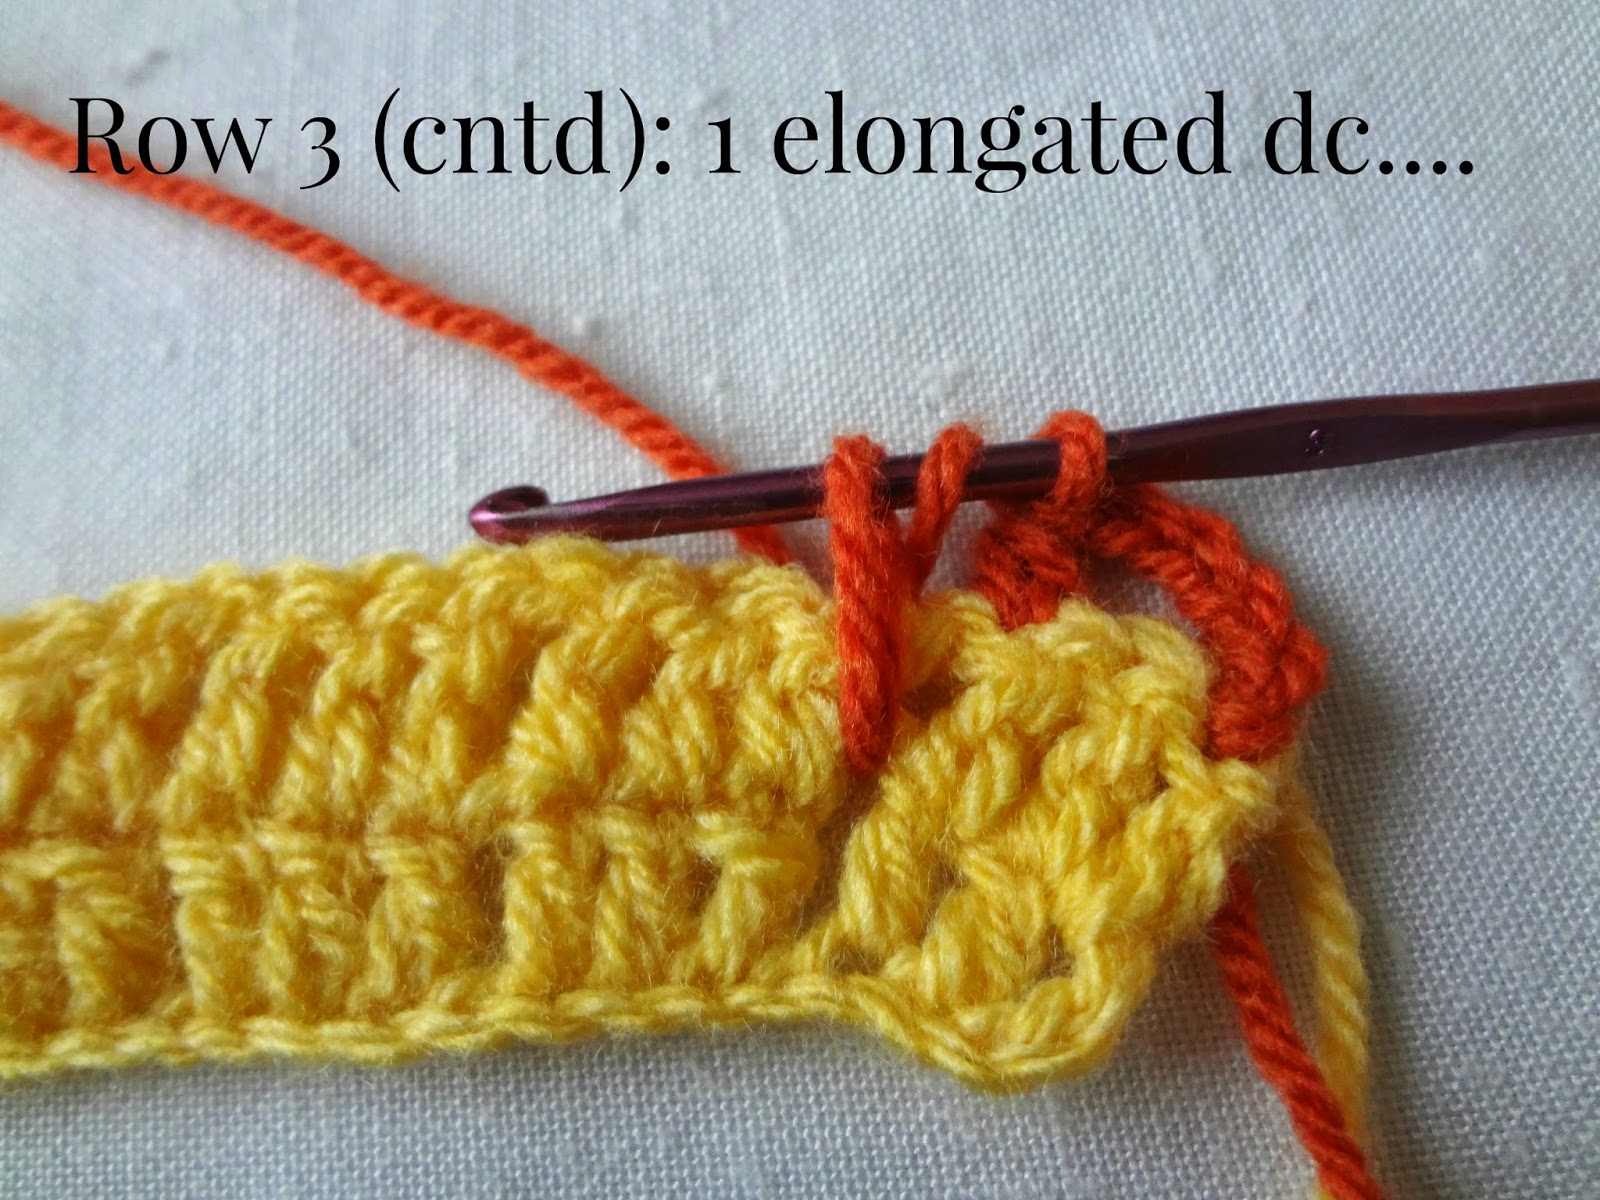

How to make that elongated dc:

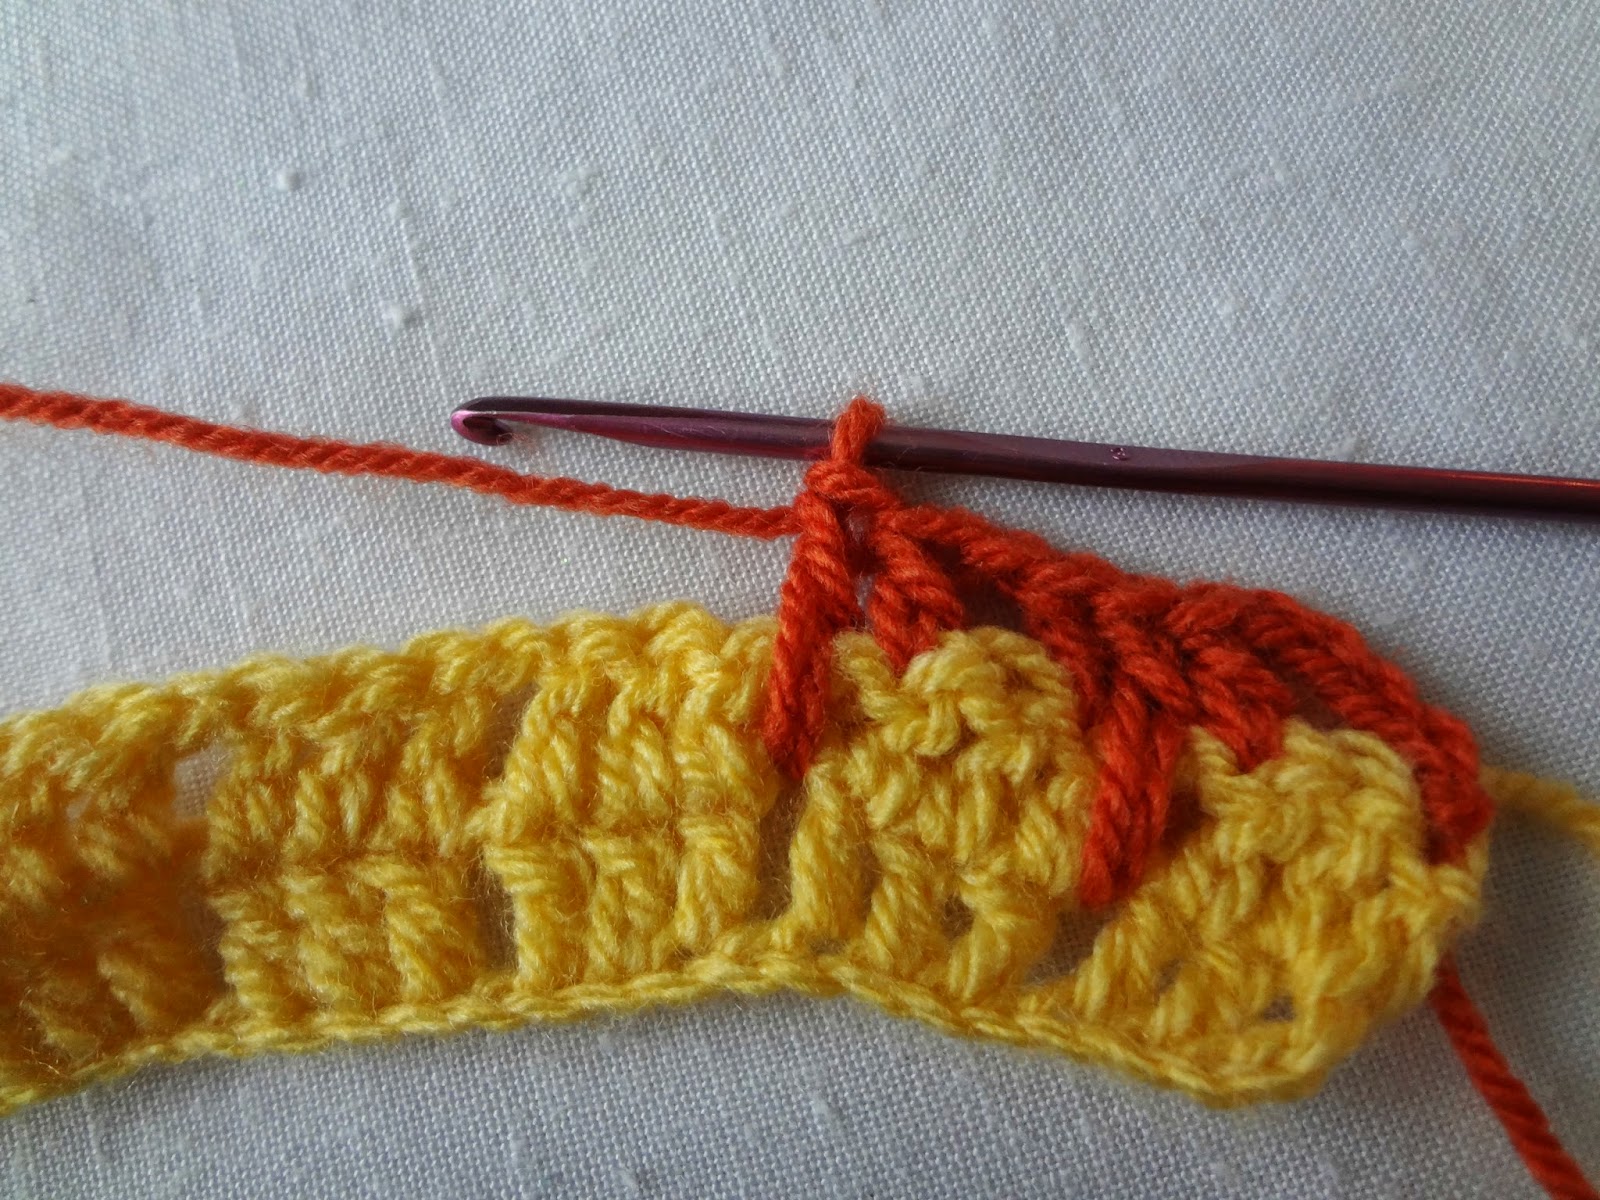
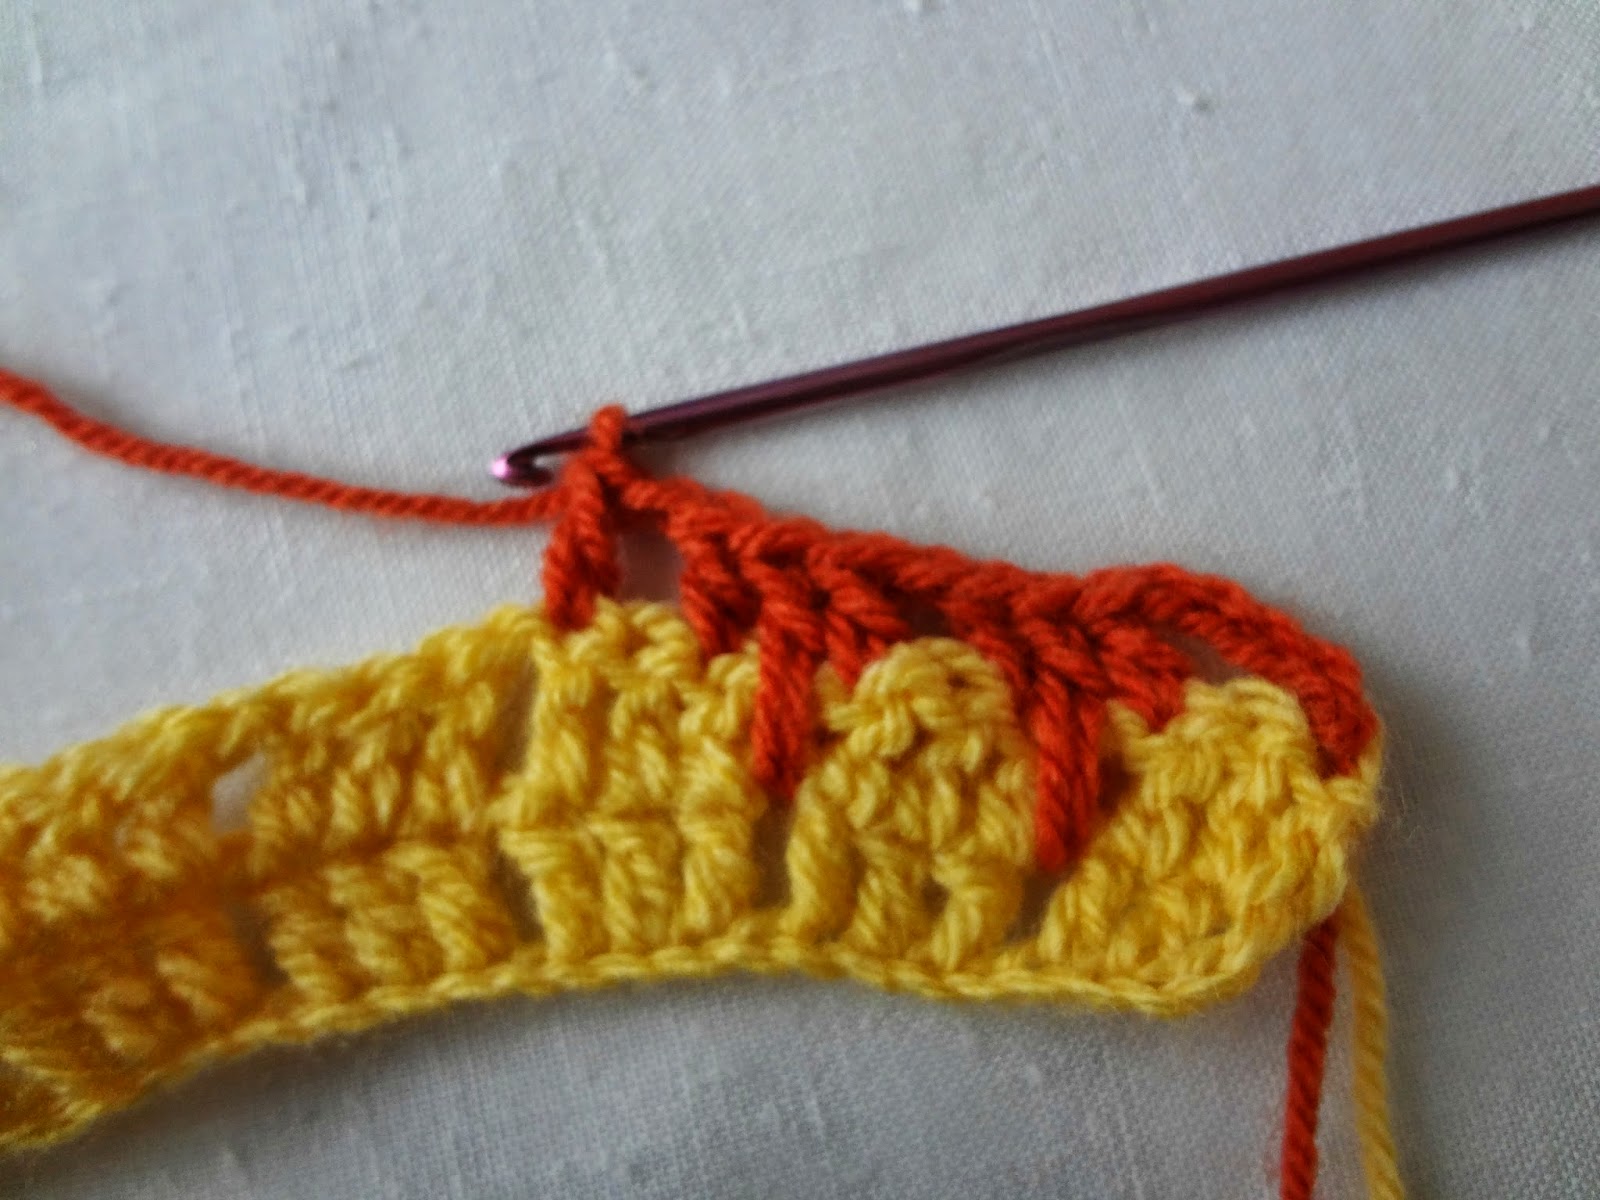
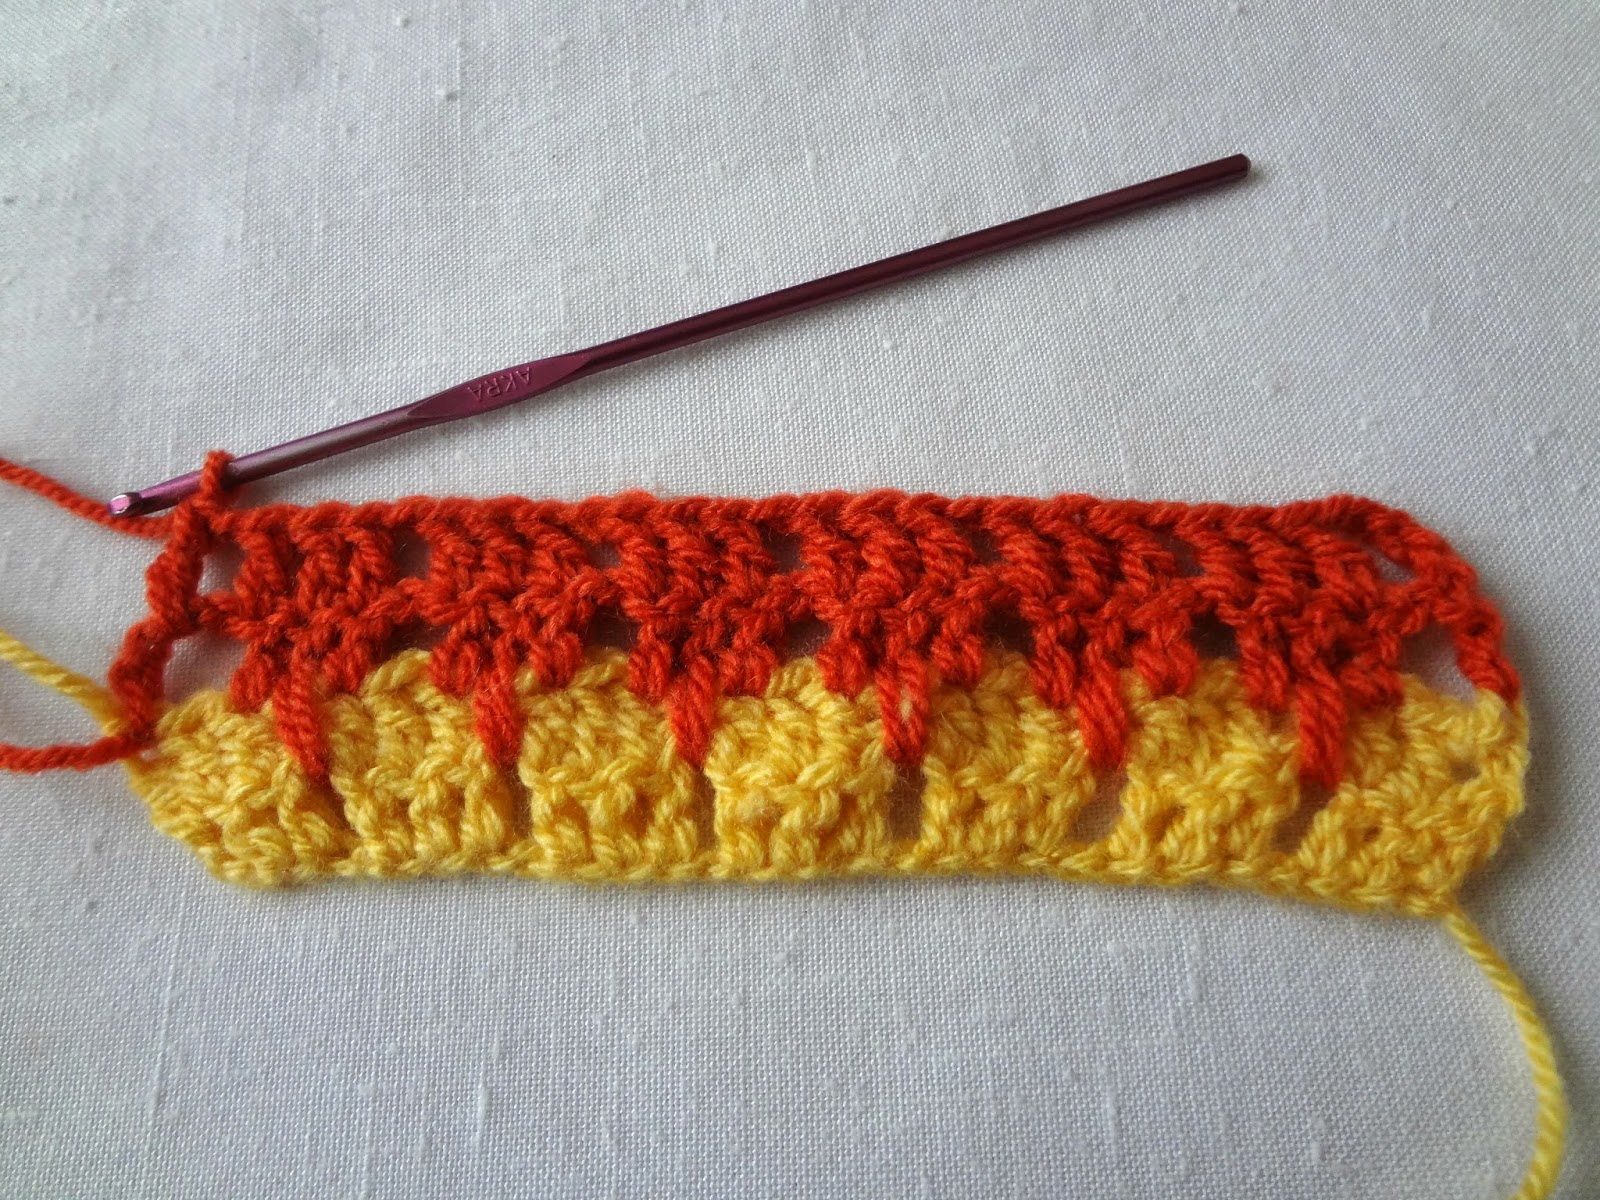
Continue working the pattern to the end
For my sample block I ended by making the first dc of the larksfoot stitch (look closely at the picture). So whatever stitch number you choose (for the foundation) do not get confused if it ends differently (and it certainly will) - you just follow the pattern and be fine wherever it ends.
Mind the next row, though.
From now on you repeat rows 2 and 3.
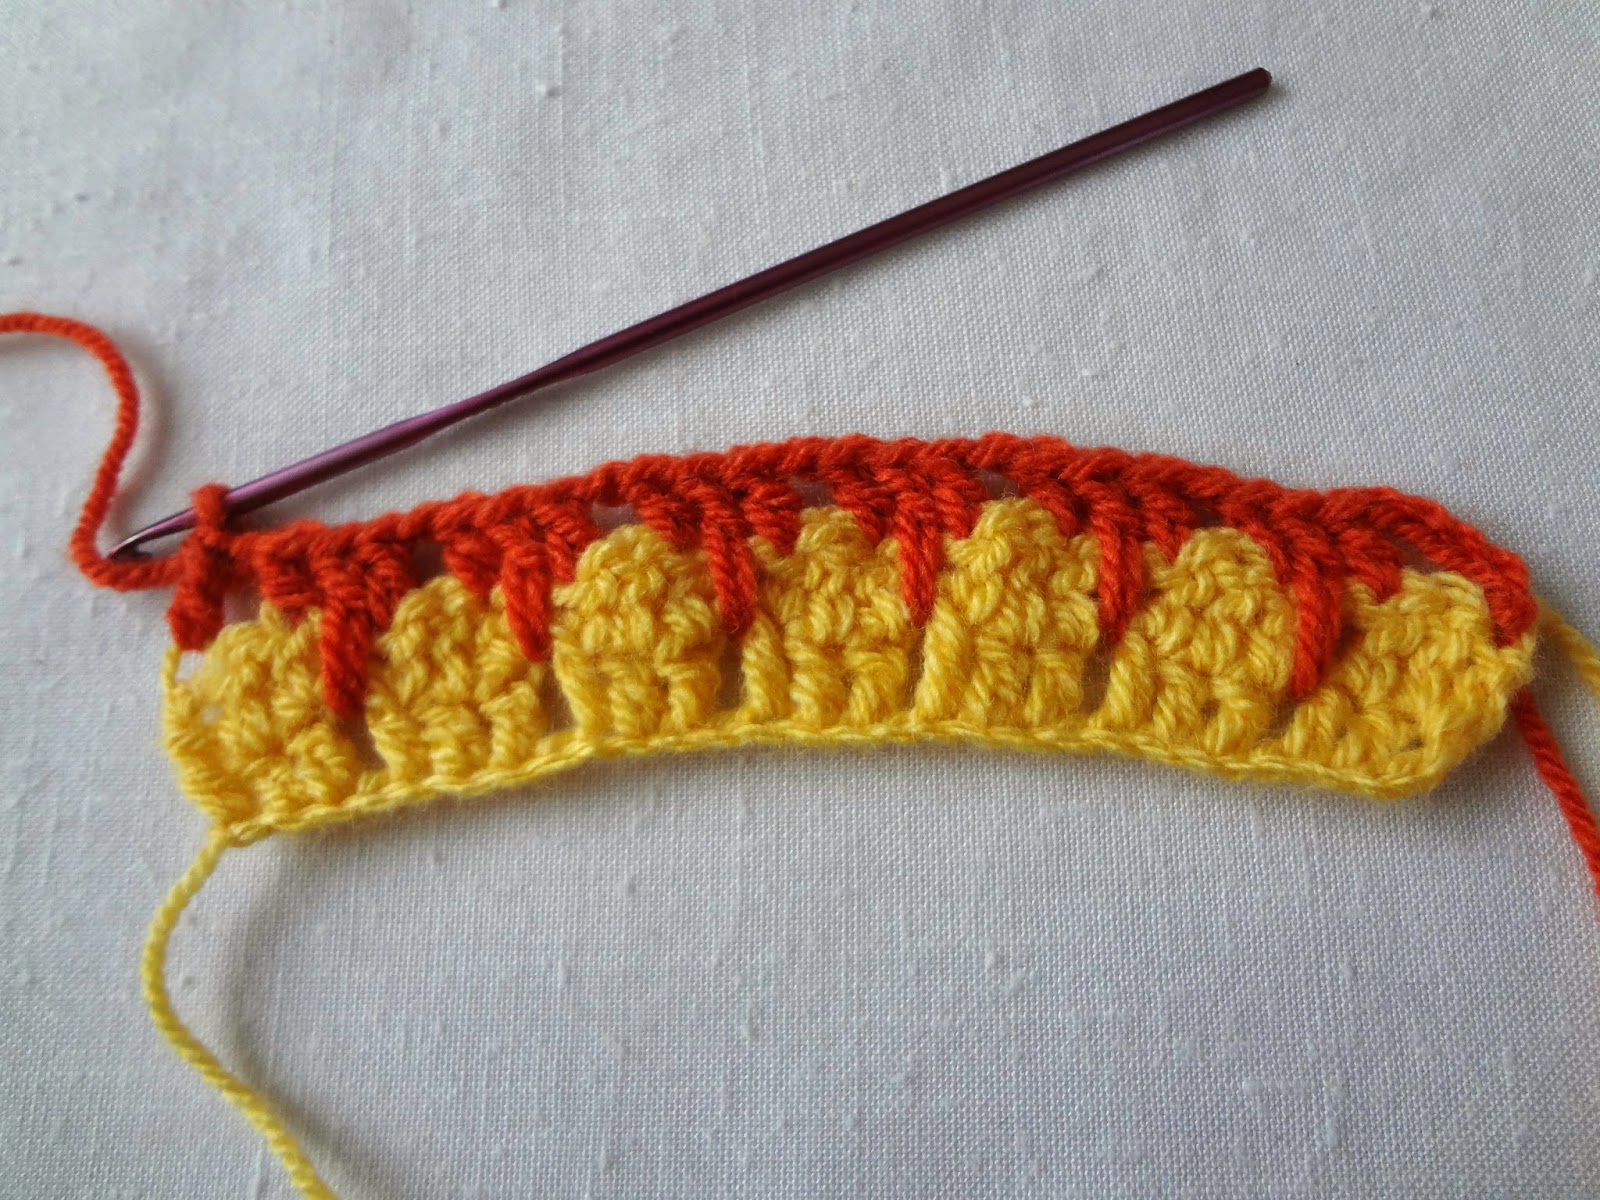
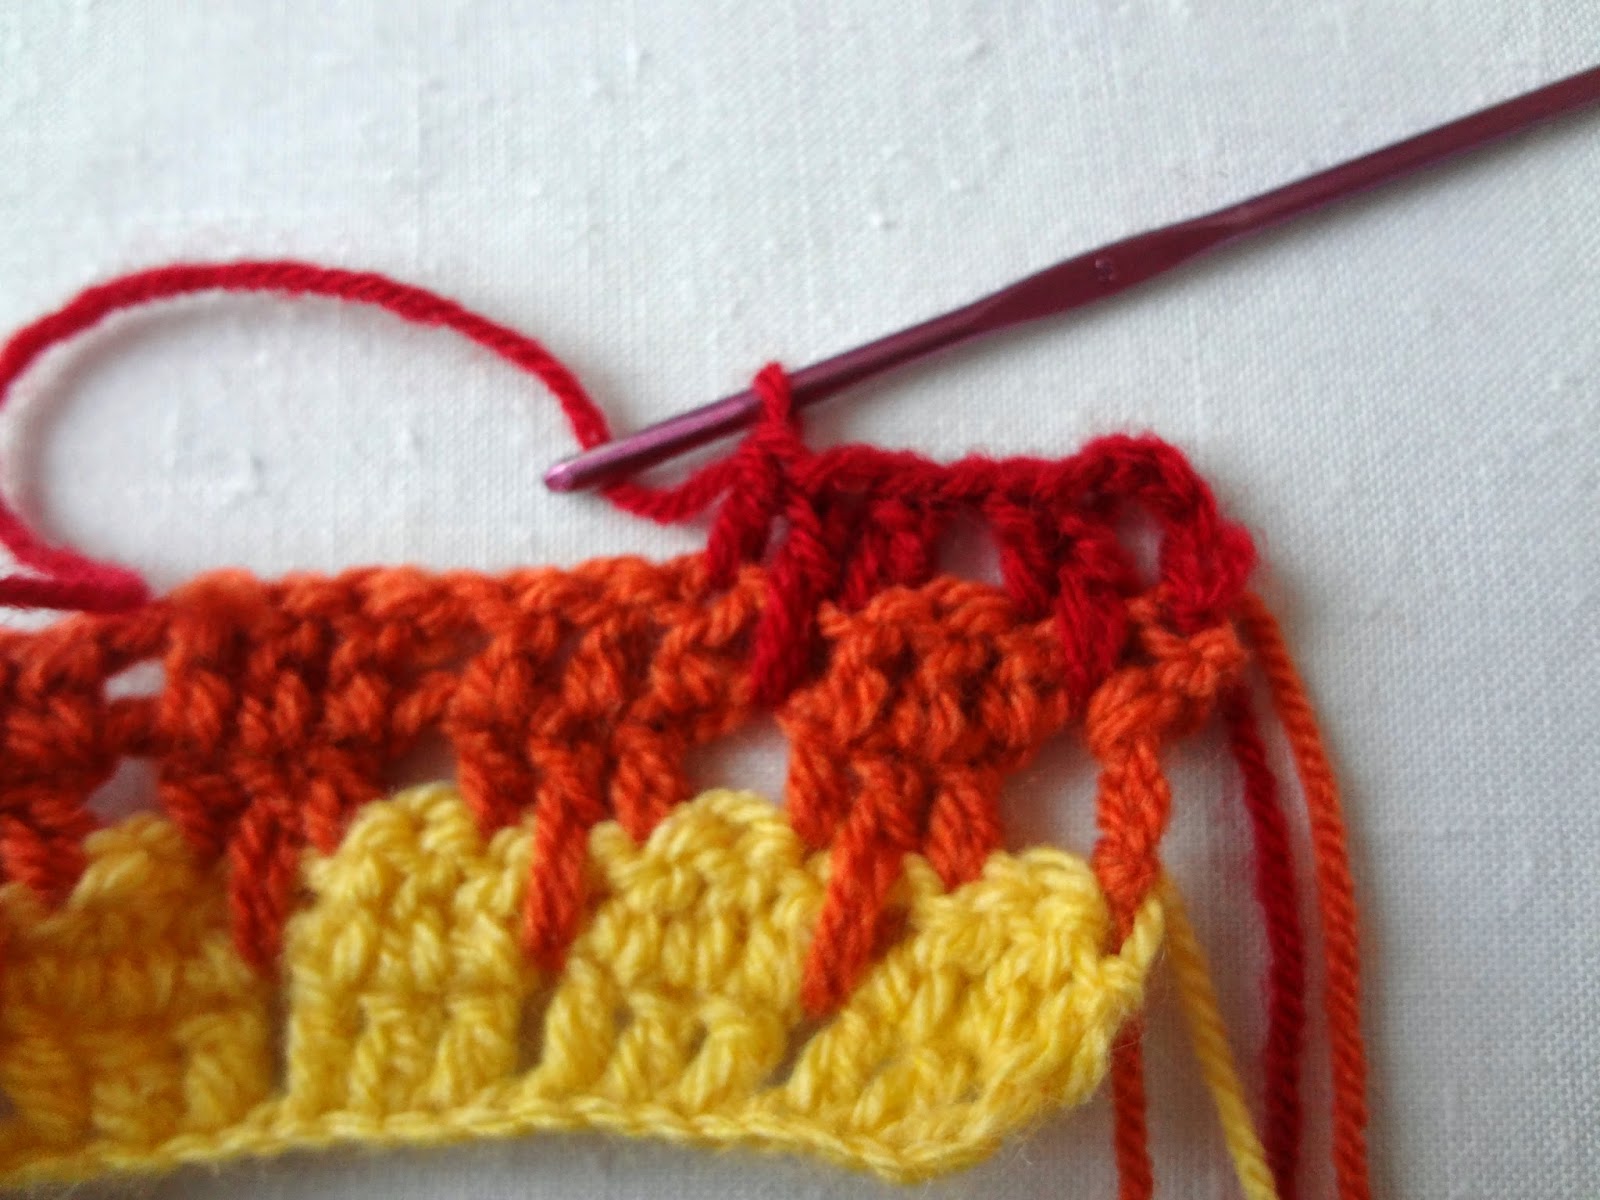
Row 4: repeat row 2 (mind how you finished). As you can see from the picture, I chained 4 and repeated row 2 across.
Row 5: repeat row 3 (the larksfoot stitch)
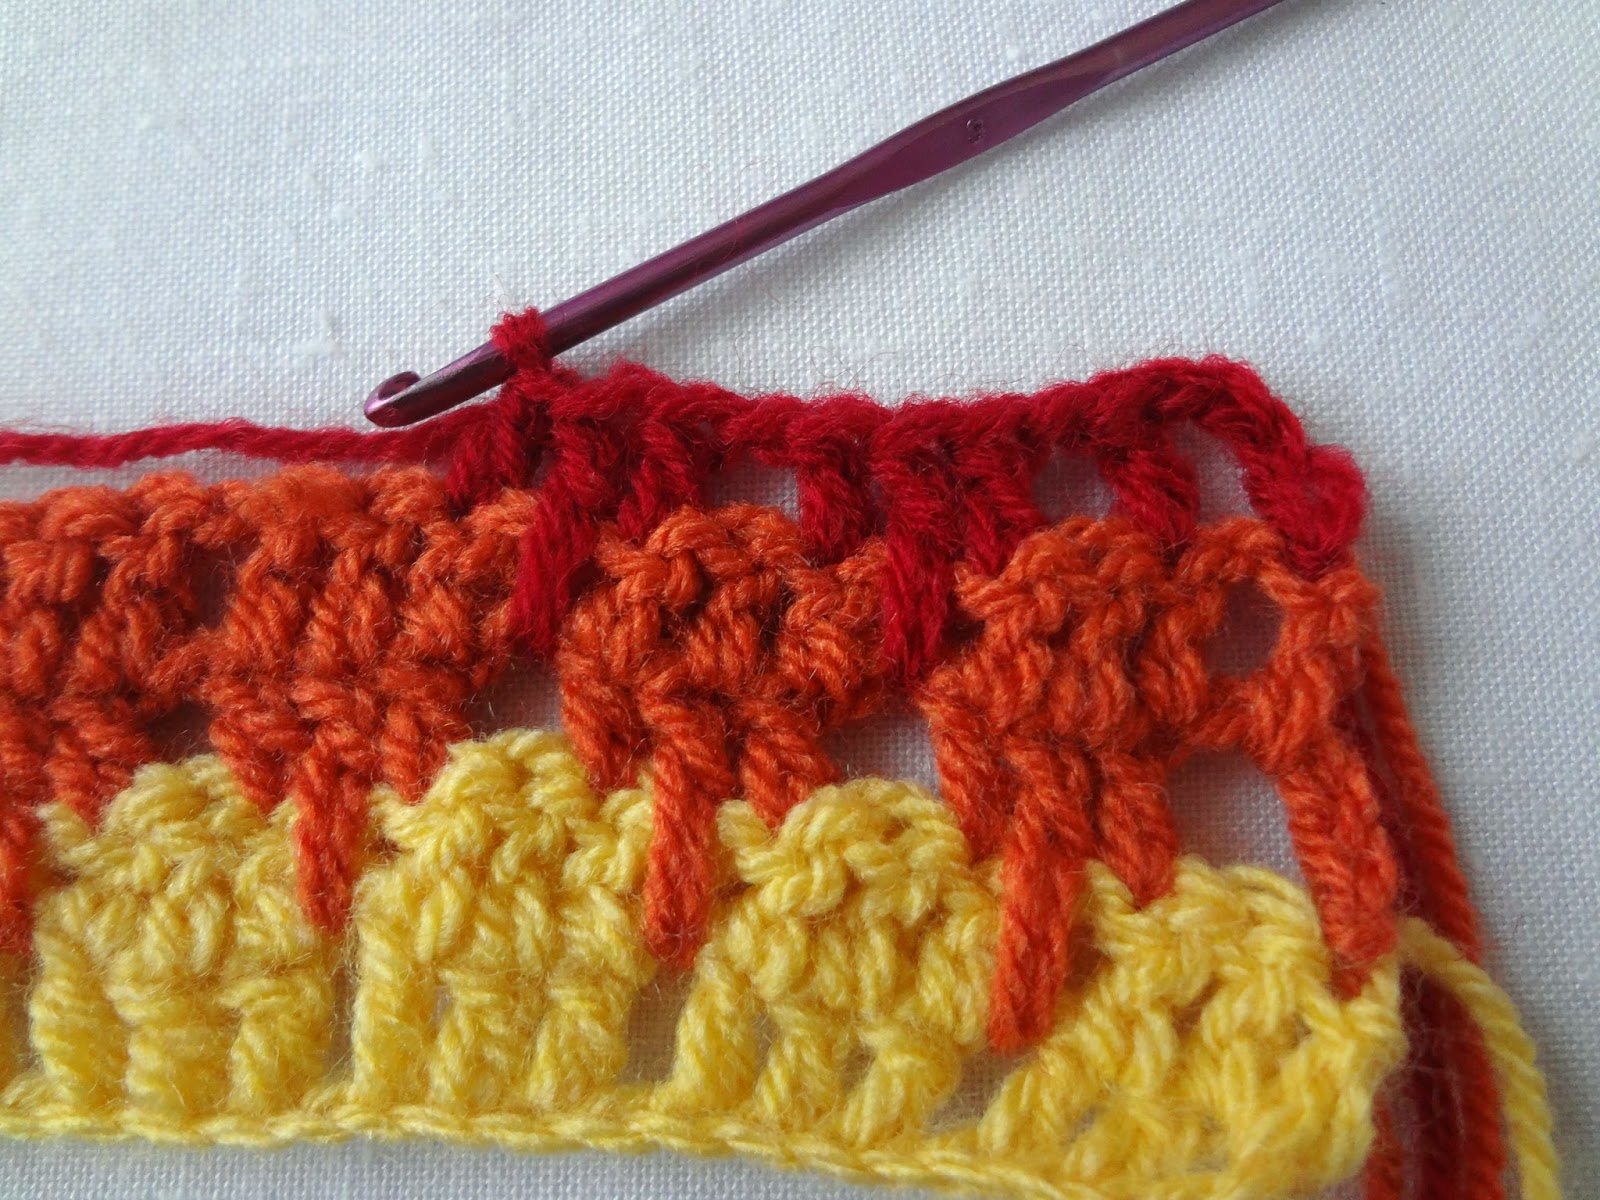

Row 6: repeat row 2
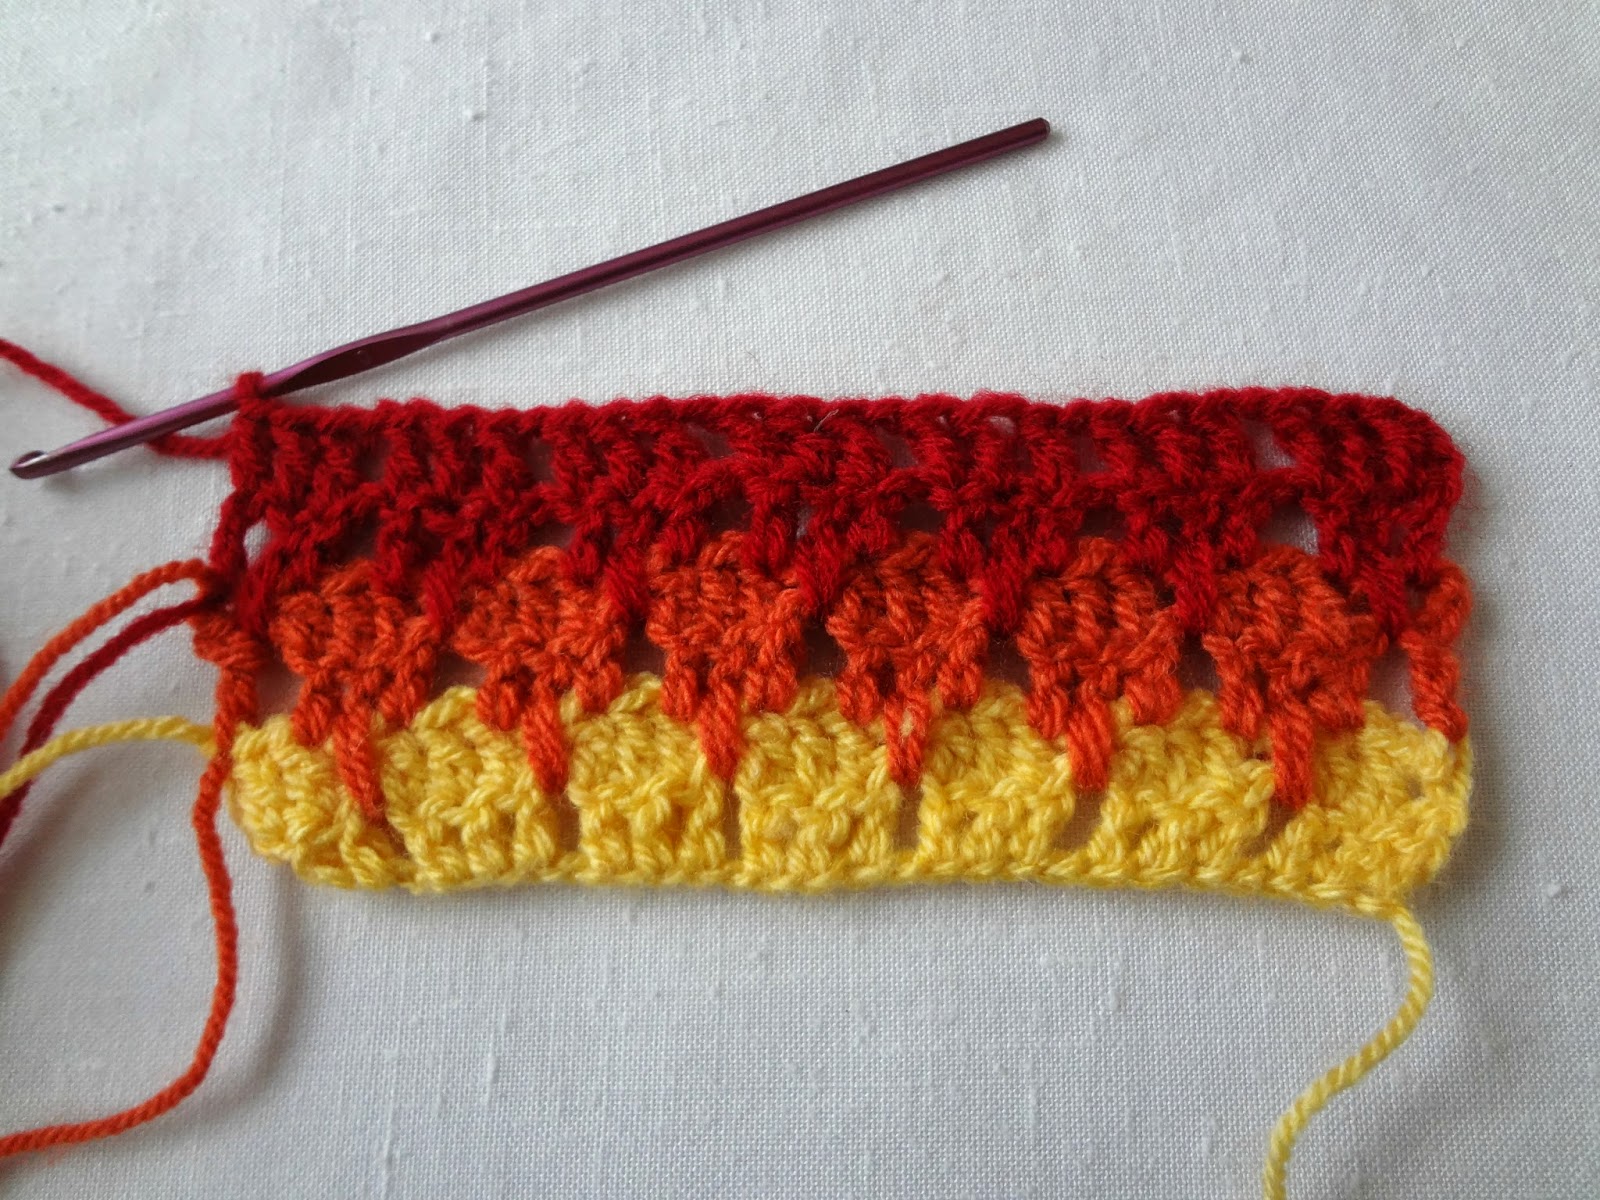


The pattern is great for blankets and scarves. I made a scarf for myself but I'll show it in another post.

25 comments:
Hi Maya,
I hope you are enjoying your travels. Thanks for sharing this stitch. It is lovely and I would love to try it out. Enjoy!
Julie xo
We really enjoyed our time here Julie, but as with all good things, thevtime has come for us to go home. Tonight is the last night here. Thank you on the sweet comment, I do hope you give the pattern a try :)
I'm glad to learn this stitch, Maya. I've seen it before and wondered how it was done, and could really understand your instructions :-), which is good.
Meanwhile, enjoy what little is left of your holiday!
Amalia
xo
one of my favorite stitches!
Glad to hear that!
Thank you Amalia! I am glad you like it :)
Thank you for sharing this stitch. It is perfect for a scarf and the colors are so vibrant.
Loved learning about Popeye's Village :)
You are welcome Irene :)
It's a gorgeous stitch Maya, and I've told you before: you're a great teacher! Happy travelling!
♥Ira’s Crea Corner♥
Thanks for the wonderful pictures. Using the different colors does help greatly to see where the hook should go. I'm going to give it a try.
Thank you Ira! We returned home on the 15th, so the travel is over. Hope the next one happens soon :)
Thank you pqueenie!
What a wonderful stitch! Thanks for the tutorial and enjoy your travels.!
Great tutorial! Thank you! I believe there is a variation of it called the Goblet Stitch. It makes a nice reversible fabric.
Thank you Snap! Hope you try it!
That's great Nathalie! Thank you for the heads up. I must try the goblet stitch.
Last week at my craft group one of the ladies showed me how to do this pattern but she only knew it from copying a blanket she saw. She will be very happy that I have managed to get a pattern for her. I love the pattern..
Thank you so much Jane! I hope this helps your friend :)
Maya, I am curious about the colors you used in the Pintrist post there was what looked like a burnt orange turquoise, very light blue. Would you help out with giving me the colors. Thank you. Linda
Hi Linda, the picture I used in the other post is not mine - I found it on pinterest. I am sorry I cannot be of any help in giving the brand and size of yarn. The colors were turquoise, orange and white.
Thank you for this tutorial. It was super easy to follow and I made a scarf fo myself but using a multicolored yarn. It doesn't show up the 'icicles' as much as if I had used a different colour in each row but I love it just the same.
I am excited to use this pattern...I have been looking for something with a little different look....I plan on a 3 color blanket for a friend....do you have a recommendation as to how many colors are the best effect for this stitch?
I am glad you like it . It is such a "textured" stitch.
I am glad you like it Suzy. The best effect is gained with 6 hues of a partiicular color.
found this stitch by chance through 12 tomatos on fb. It is a great looking pattern and appropriately named. I want to make it into a large throw. Will I be okay if I stick to rows that are multiples of 4? I am going to play around with it and make some samples. Thank you for sharing.
Post a Comment