Sunday, June 29, 2014

Crocheted Summer Bracelets - free tutorial


 Hello everyone! 

Today I have a wonderful project to share with you. And it is heavenly easy to make. 
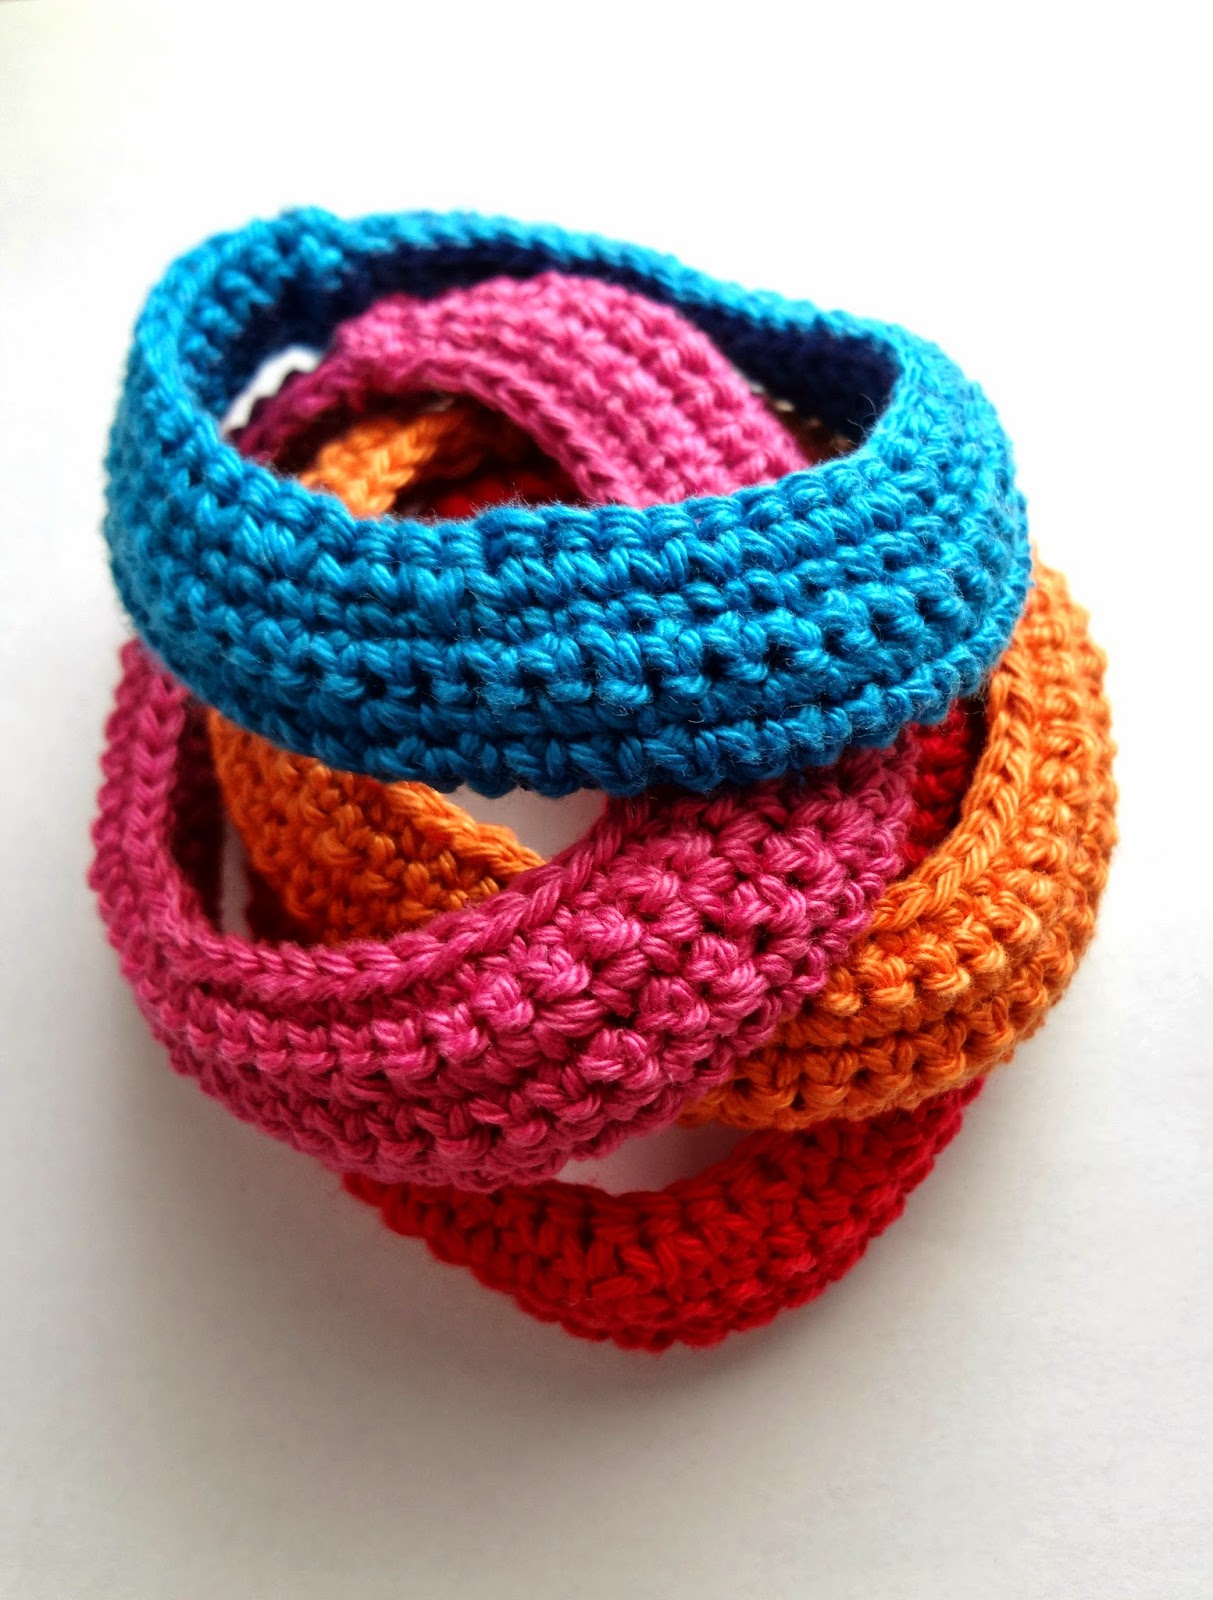
I made these flat, stacking bracelets (see pictures at the end) last summer and they were such fun to wear so this year I decided to make some more but a bit different. 
 

 To make these you need cotton crochet yarn / thread. I used sport yarn and adequate hook.
For a wrist circumference of  16cm/ 6.3" I chained 52 +1 as a sc for the next row. 
Row 1 to 8: sc in all stitches. Remember to chain 1 more at the end of each row as the beginning sc for the next row.


After the second row measure it on your wrist to see if it fits. It shouldn't be too snug because you have to slip your hand through it when done.


My finished 8 row piece measures about 3.4 cm / 1.3" in width


Next , fold it, right sides facing ...


... and bring the yarn through both sides so that you can work that edge.


sc through both sides.
 

 The bracelet measures about 2 cm / 0.8".


When you come to the end, join the ends and sl stitch them in the round. You may also take a tapestry needle and sew them.


First slip stitch the upper layer. Turn the bracelet as you work so that it is easy to do it in the round.


The finish. If you want to conceal the finish you may decorated it with beads or add a piece of fabric over it. 


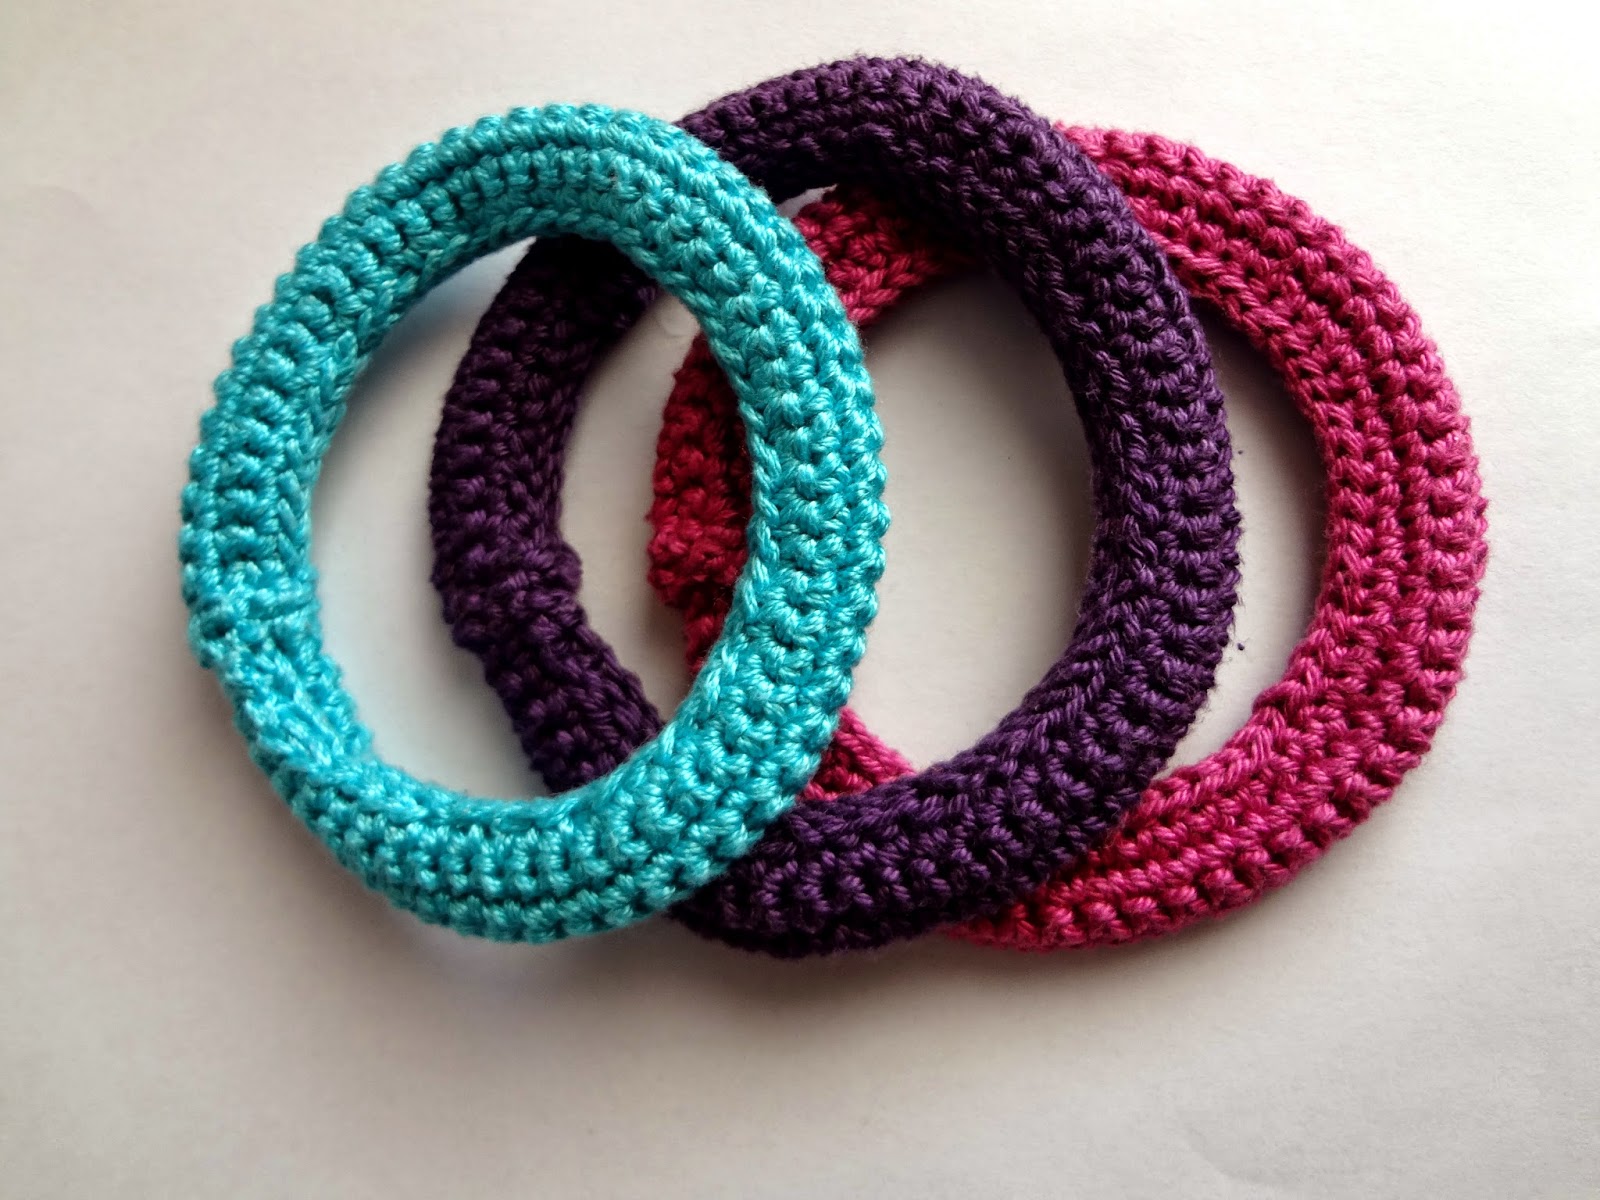
These are the "flat" bracelets I talked about above. I call them flat because they are literally flat - I made only 5 rows of sc and that gives them the flatness, while the other ones gain a dome-shaped quality when done. 


For many different looks, you can combine both types.
 

I hope you like this project!

Thursday, June 26, 2014

Crochet Health Survey


Recently I was asked to share a crochet health survey undertaken by Kathryn Vercillo. She  is the author of Crochet Saved My Life, a book about the craft’s health benefits. 
In the book she shares her own story of crocheting to heal from chronic depression. She also interviews two dozen other women who share their stories of hooking to heal.

Now Kathryn is asking for YOUR help! She’s running a Crochet Health Survey, to see how crochet helps people. From the description: ” This is a 27-question survey (mostly multiple choice) designed to gather detailed information about the physical and mental health issues that are helped through crochet work and to what degree the craft is helpful.” 
Read more at http://www.mooglyblog.com/crochet-health-survey/#21mwDhc0uHe5jhY1.99
As for the survey: it is a 27-question survey (mostly multiple choice) designed to gather detailed information about the physical and mental health issues that are helped through crochet work and to what degree the craft is helpful. The survey is produced by Kathryn Vercillo, an expert in the topic of healing through crochet.
Now Kathryn is asking for YOUR help! She’s running a Crochet Health Survey, to see how crochet helps people. From the description: ” This is a 27-question survey (mostly multiple choice) designed to gather detailed information about the physical and mental health issues that are helped through crochet work and to what degree the craft is helpful.” 
Read more at http://www.mooglyblog.com/crochet-health-survey/#21mwDhc0uHe5jhY1.99

So to all crocheters out there, please take the survey and share it with your readers:
https://www.surveymonkey.com/s/crochetsaveslives

You can also read Kathryn's post here 

https://www.etsy.com/shop/sewella

https://www.facebook.com/pages/Little-Treasures/337082126318631

http://instagram.com/mayakuzman/

https://www.pinterest.com/littletreasures
 

Wednesday, June 25, 2014

Summer Flower Necklace - pdf pattern


Let's celebrate summer!

I am running a little late posting these two lovelies. I originally intended to post them to celebrate the summer solstice. 

The beauty of this pattern is that with the 8 flowers used one can make an incredible number of necklace and bracelet designs. 

I quite enjoyed making them (as I always do) and playing with color combinations. I plan to actually make myself one in blues. 

The pattern is here and here.


Sunday, June 22, 2014

Matka Canyon


One of our favourite retreats on Sundays - the Canyon of Matka. 


With it's geological, geomorphological, hydrological characteristics, as well as with the flora and fauna, it is an exceptional monument of nature. The main phenomenon of this natural treasure is the canyon, a distinguished geomorphological entity with well preserved natural and geographic characteristics created by vertical erosion  is the habitat for many rare and endemic species. For example there is an incredible number of endemic species of butterflies (84) that cannot be found anywhere in the world, the protected white-headed eagles, vultures, bats....


When we headed for Matka today, we had a particular plan - to visit one the caves - the Vrelo Cave. It is located on the left side of the canyon and the only way to access it is by boat. 


Vrelo Cave is a system of two caves, one above and one underneath the water, and a lake. The highlight of the top cave is a three meter high stalagmite, called the „Pine Cone”. The actual depth of the submerged cave has not yet been determined, it seems to lie well over 500 m, and therefore some consider Vrelo Cave to be Europe’s deepest underwater cave.


The canyon area is also a home to several historic churches and monasteries. The one I am showing today is St. Andrew's Monastery built in 1389.


Thursday, June 19, 2014

Turn a doily into a bag


This doily came with all the other stuff I inherited from hub's grandmother. I have no idea what she planned to do with this one - probably a tablecloth although the design is such that there is a lot of space in the middle that would fit over a ball.


I made a couple of dcs just to give it a finish.

  
Deep in work I completely forgot to take pictures of what I further made. 

I lined the doily with taffeta and to make it sturdier I added a cotton piece over it. Did the same for the back except the doily, because it was just one.


 I folded the upper part ...
 

 ... and then crocheted handle holders for these wooden handles I had at home. I think round wooden handles would be much more appropriate for this bag but I'll just have to leave that for another time. 


Here it is from behind. Such a lovely bag for the summer. I am sure I will use it a lot.

Monday, June 16, 2014

Scarves Into a Dress Tutorial


In the past I happily used scarves to make my daughter tops and dresses and I have a tutorial made for the Burdastyle platform what seems eons ago. When I decided to make my niece a beach dress out of scarves, that was the perfect moment to make another fresh tutorial.

This is 'a perfect project' for moms because you can have a dress made in less than 10 minutes. What makes this project even easier is that the scarves are hemmed so you don't have to bother with that.

Gather your supplies


You need two scarves and a ribbon. The scarves I used measure: 20 x 20 inches or 50 x 50 cm. 

Place the scarves one on top of the other with the face down (i.e. the wrong sides facing up).

Leave space for the casing. I left about 1.4" / 3.5 cm.
Start pinning the sides.


Since the scarves are already hemmed, pin the sides of the scarves as close as you can to the existing hem.


 Next, fold and pin the casing.


 Measure from shoulder to just below the arm pit (or a bit more for a more comfortable wear). That is the space for the armhole. I left 6" / 15.2 cm.


 Sew from the marked pin down. Sew the other side.


And sew the casings.


When everything is sewn in place, iron the sides and the casings.


Insert ribbon through both cases (I left a generous amount of ribbon for effect when tied into a bow).
 

And Voila! Your dress is done!


As you can see Ena is quite happy with her new dress.
Enjoy the tutorial!